
Overview
The Groups section in the TrustExam platform is used to manage learning groups of students and instructors. This section allows authorized users to organize participants, control access to educational content, and manage invitations.
From this section, you can:
View all existing groups
Create new groups
Manage group membership (add or remove participants)
Generate and manage invitation codes for registration or access to groups, courses, and assignments
Access to the Groups section is available to users with the following roles (depending on permission settings):
Administrator
Manager
Teacher
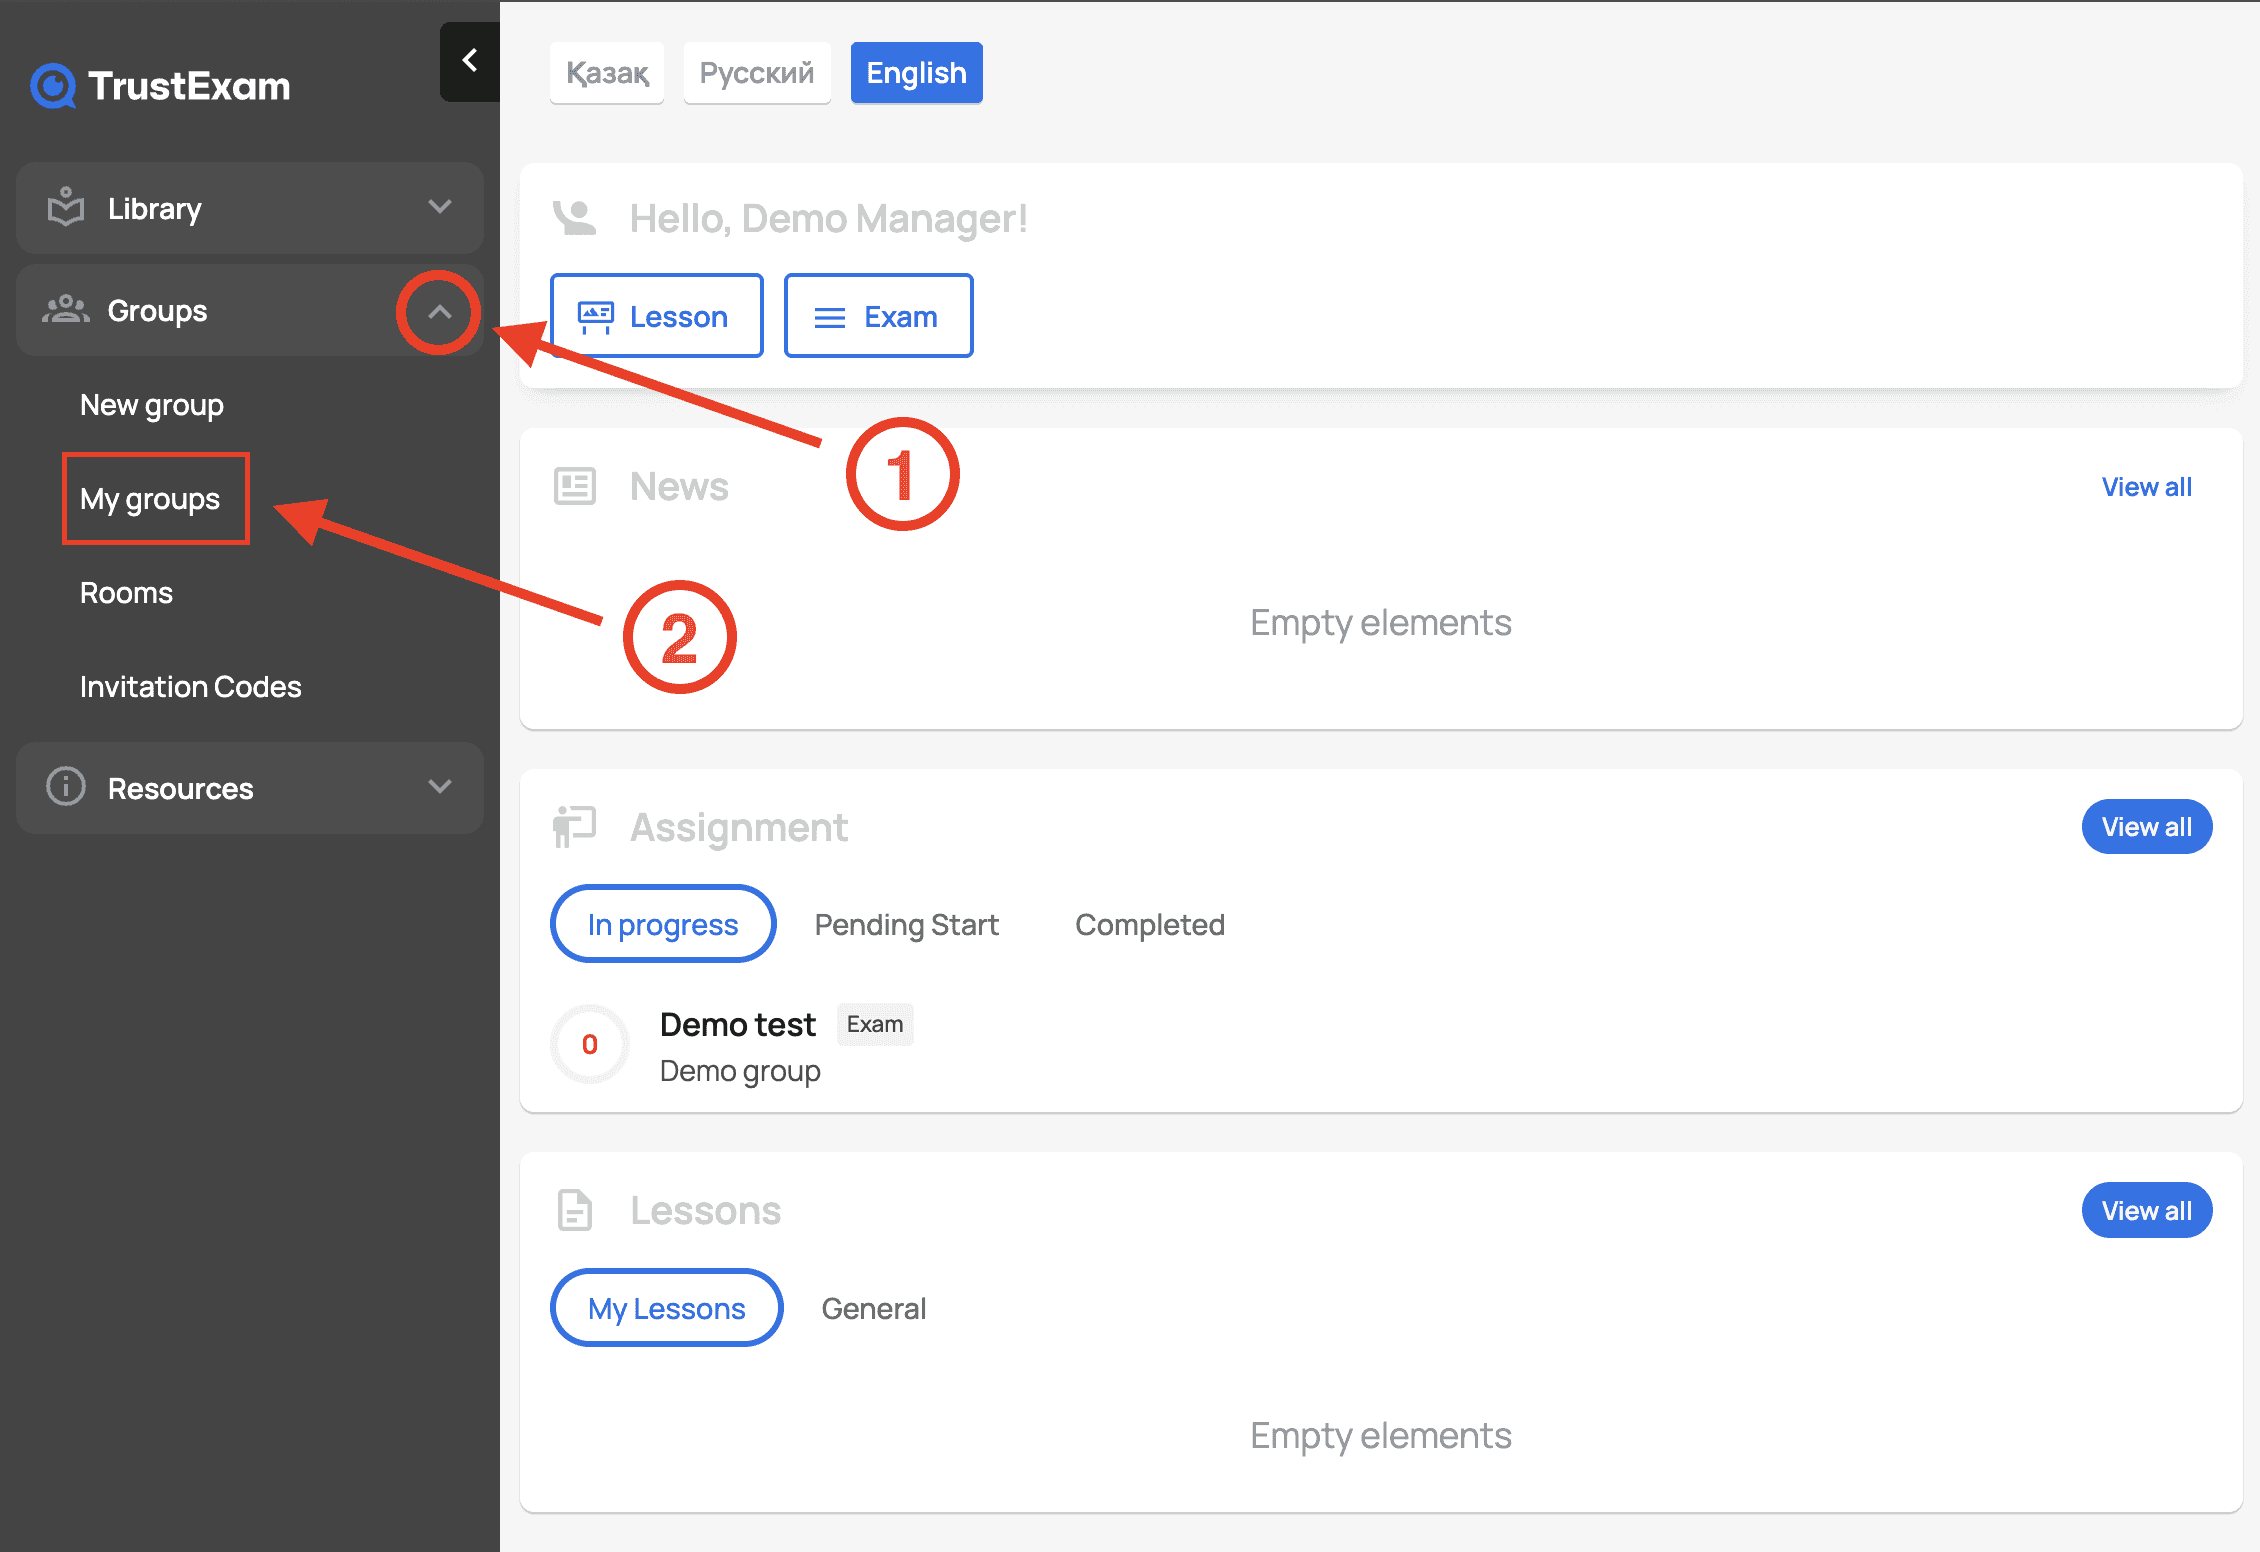
Navigating the “Groups” Section
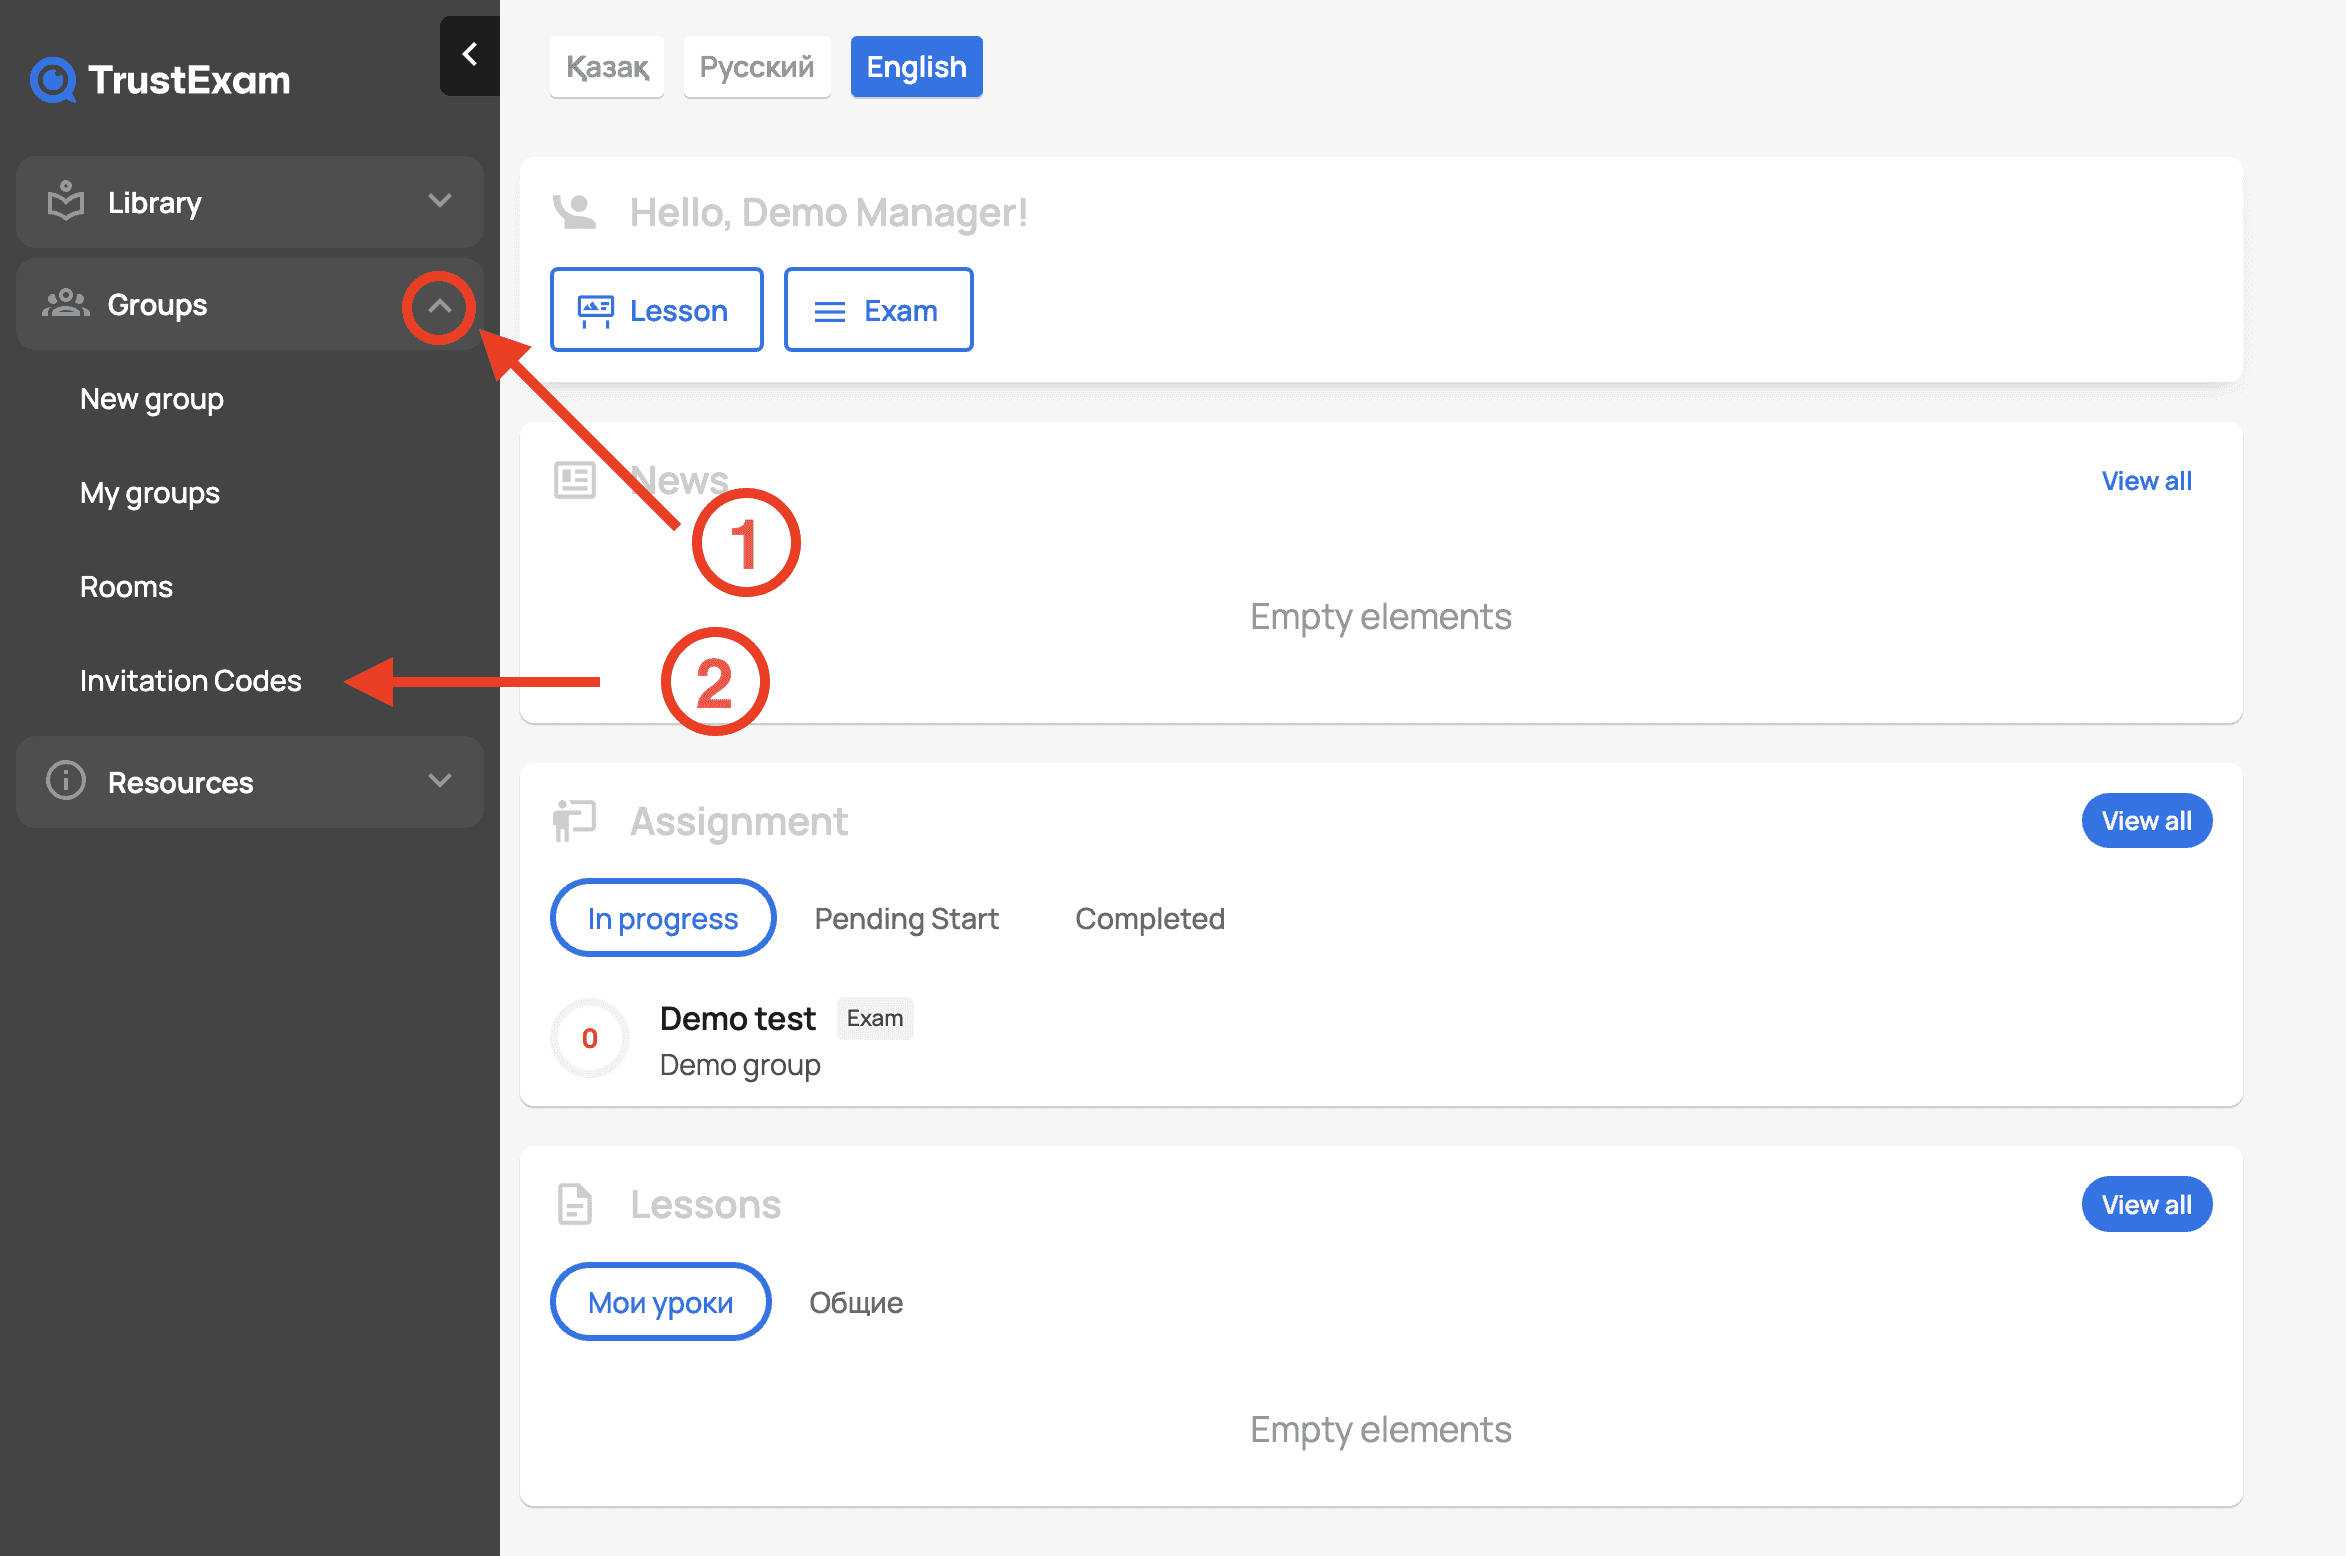
In the left sidebar, the Groups section contains three main subpages:
My Groups: a list of all groups available to the current user
New Group: a form for creating a new group
Invitation Codes: management of invitation codes
My Groups
Page Description
The My Groups page displays a complete list of all groups created in the system or accessible to the current user. Each group is shown as a card containing basic information.
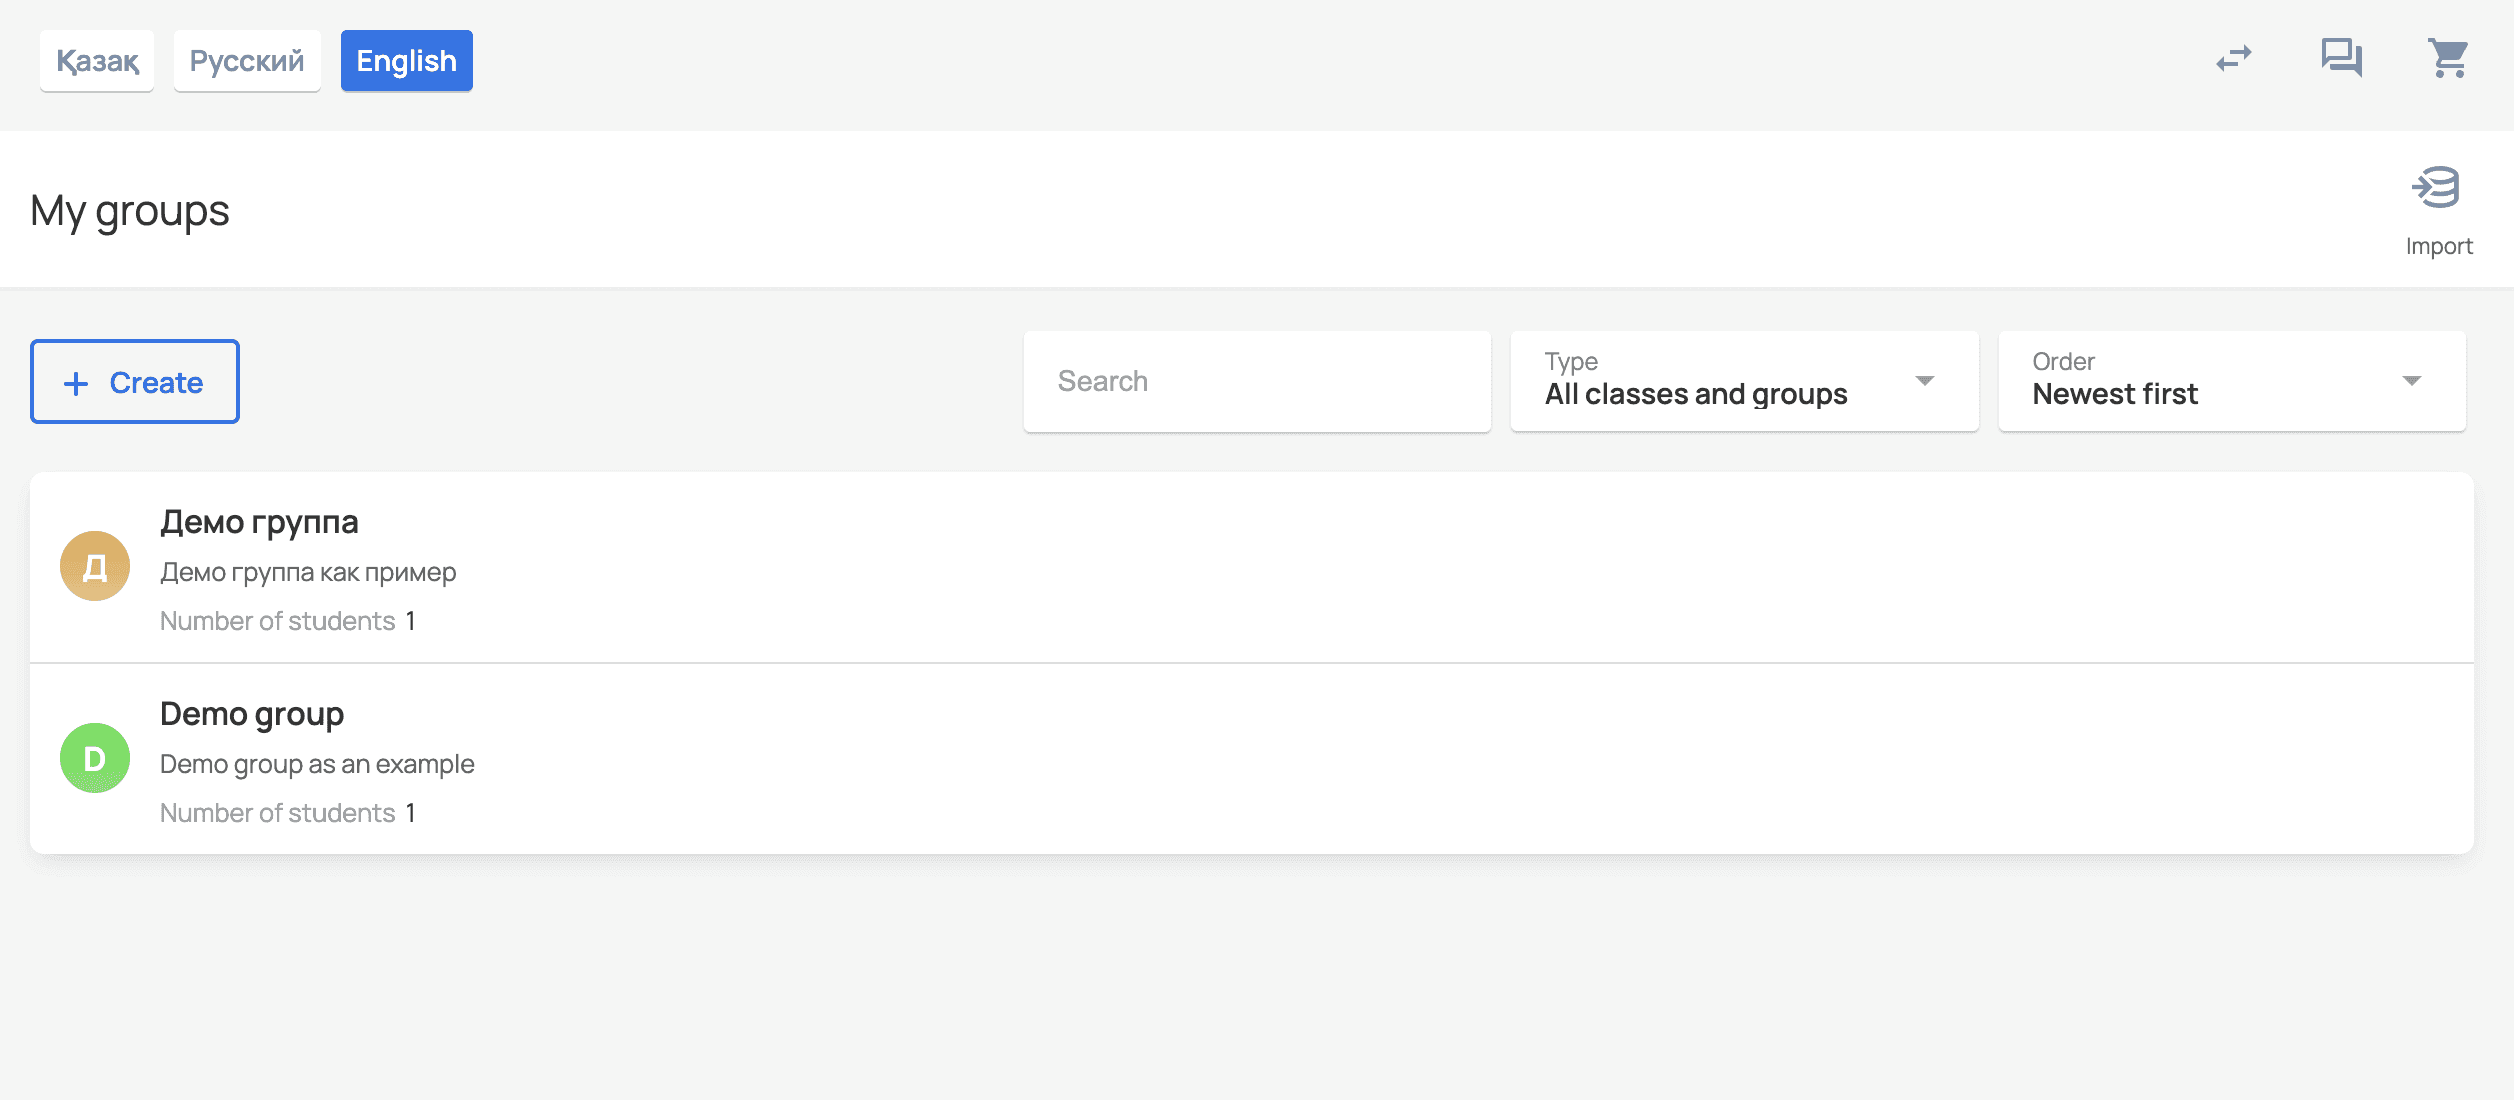
Each group card includes:
Group icon (auto-generated or custom)
Group name
Optional description
Number of students in the group
Available Actions
On this page, you can:
Search for groups using the search field (by group name)
Create a new group by clicking the Create button
Open a group by clicking on its card to view or edit details
Creating a New Group
Creation Form Overview
The New Group form allows you to define group details and add participants.
How to create a group
Press Create button on the "My Groups" page
Enter Group Name (required)
A unique name for the group (for example, Group A–2025).Enter Group Description (optional)
Additional information about the group.Press the Save button
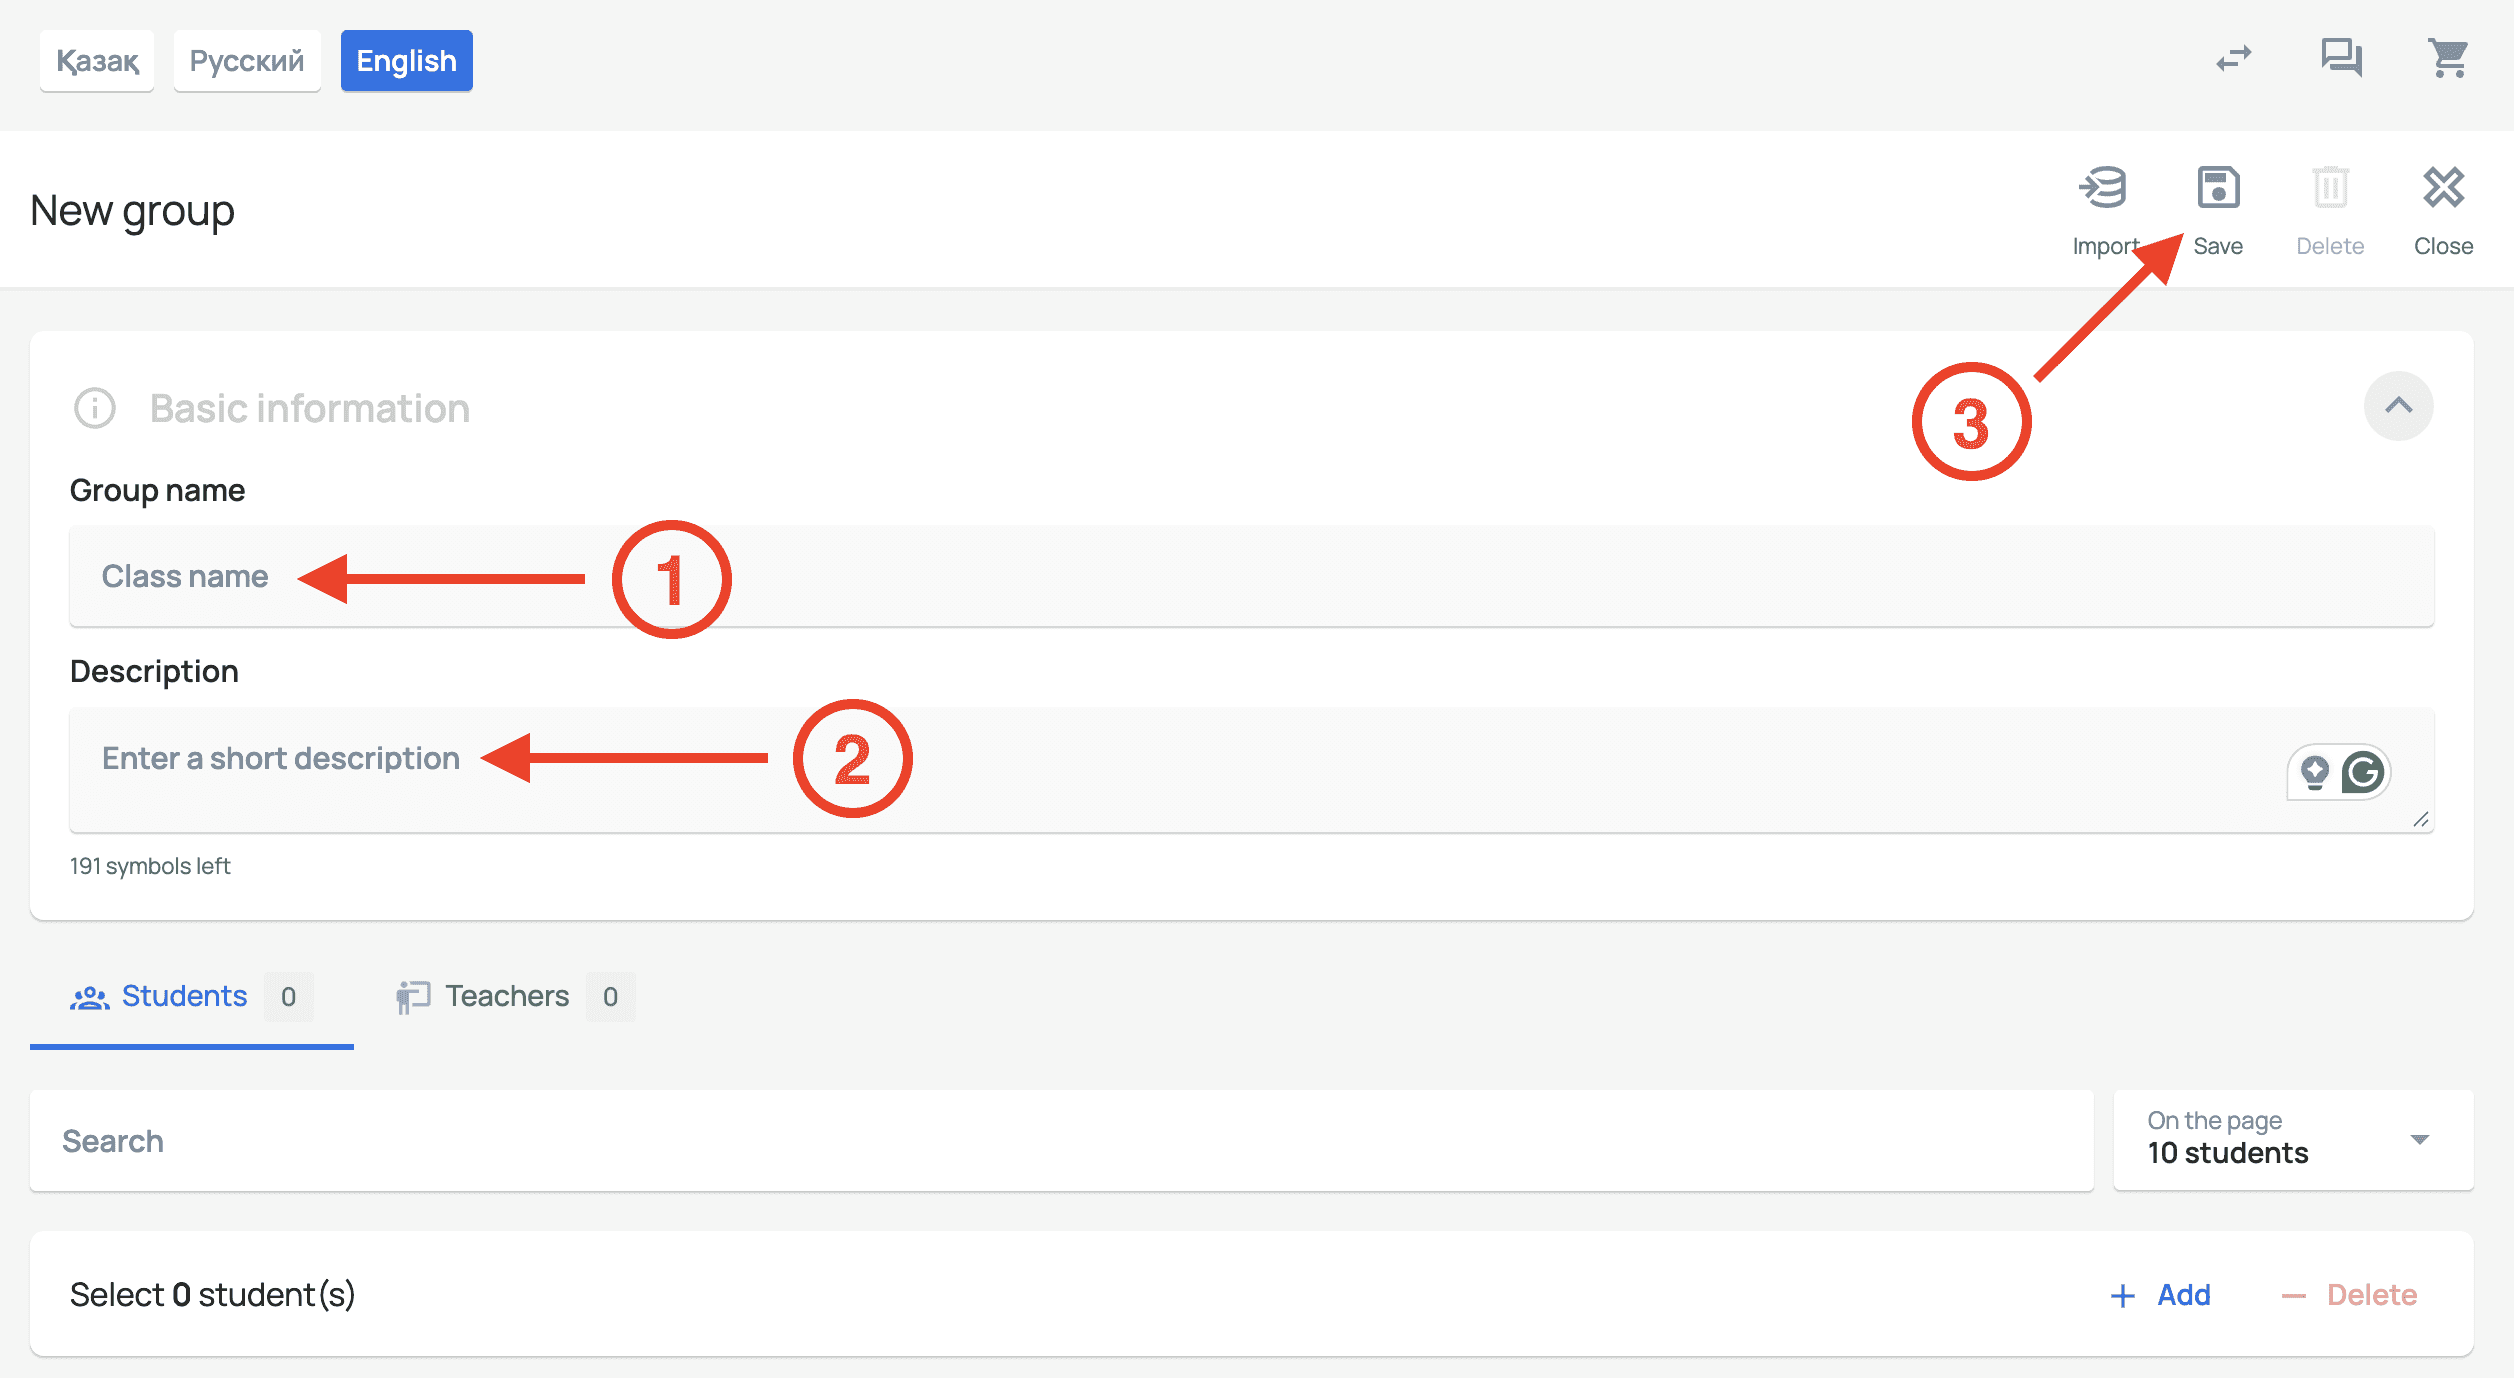
Group Members
In this section, you can add existing students and instructors:
Click the Add button.
A selection window will open with a list of existing users.
Use the search field to find users by name.
Select users to add them to the group.
You can remove participants from the group at any time.
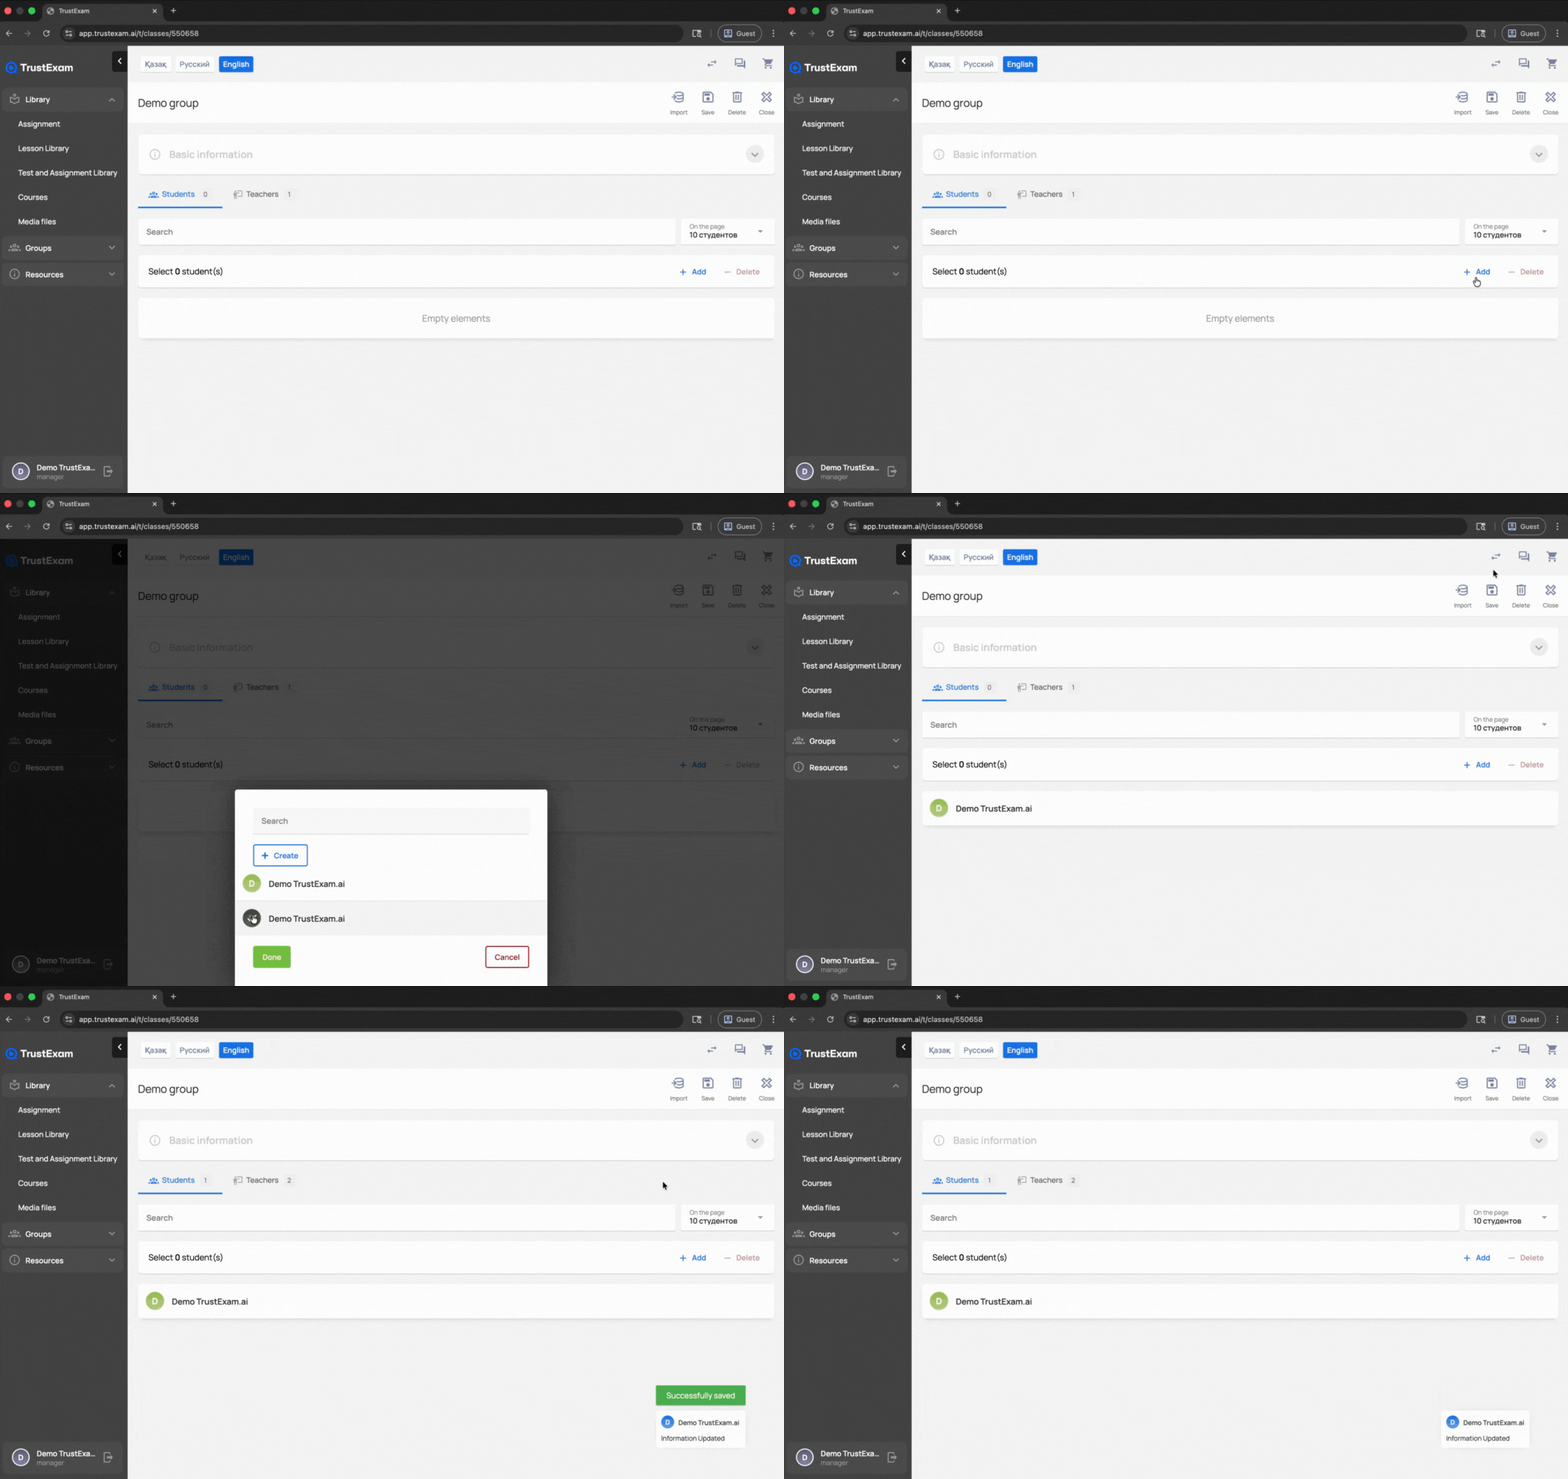
Changes to the group member list are applied immediately after saving.
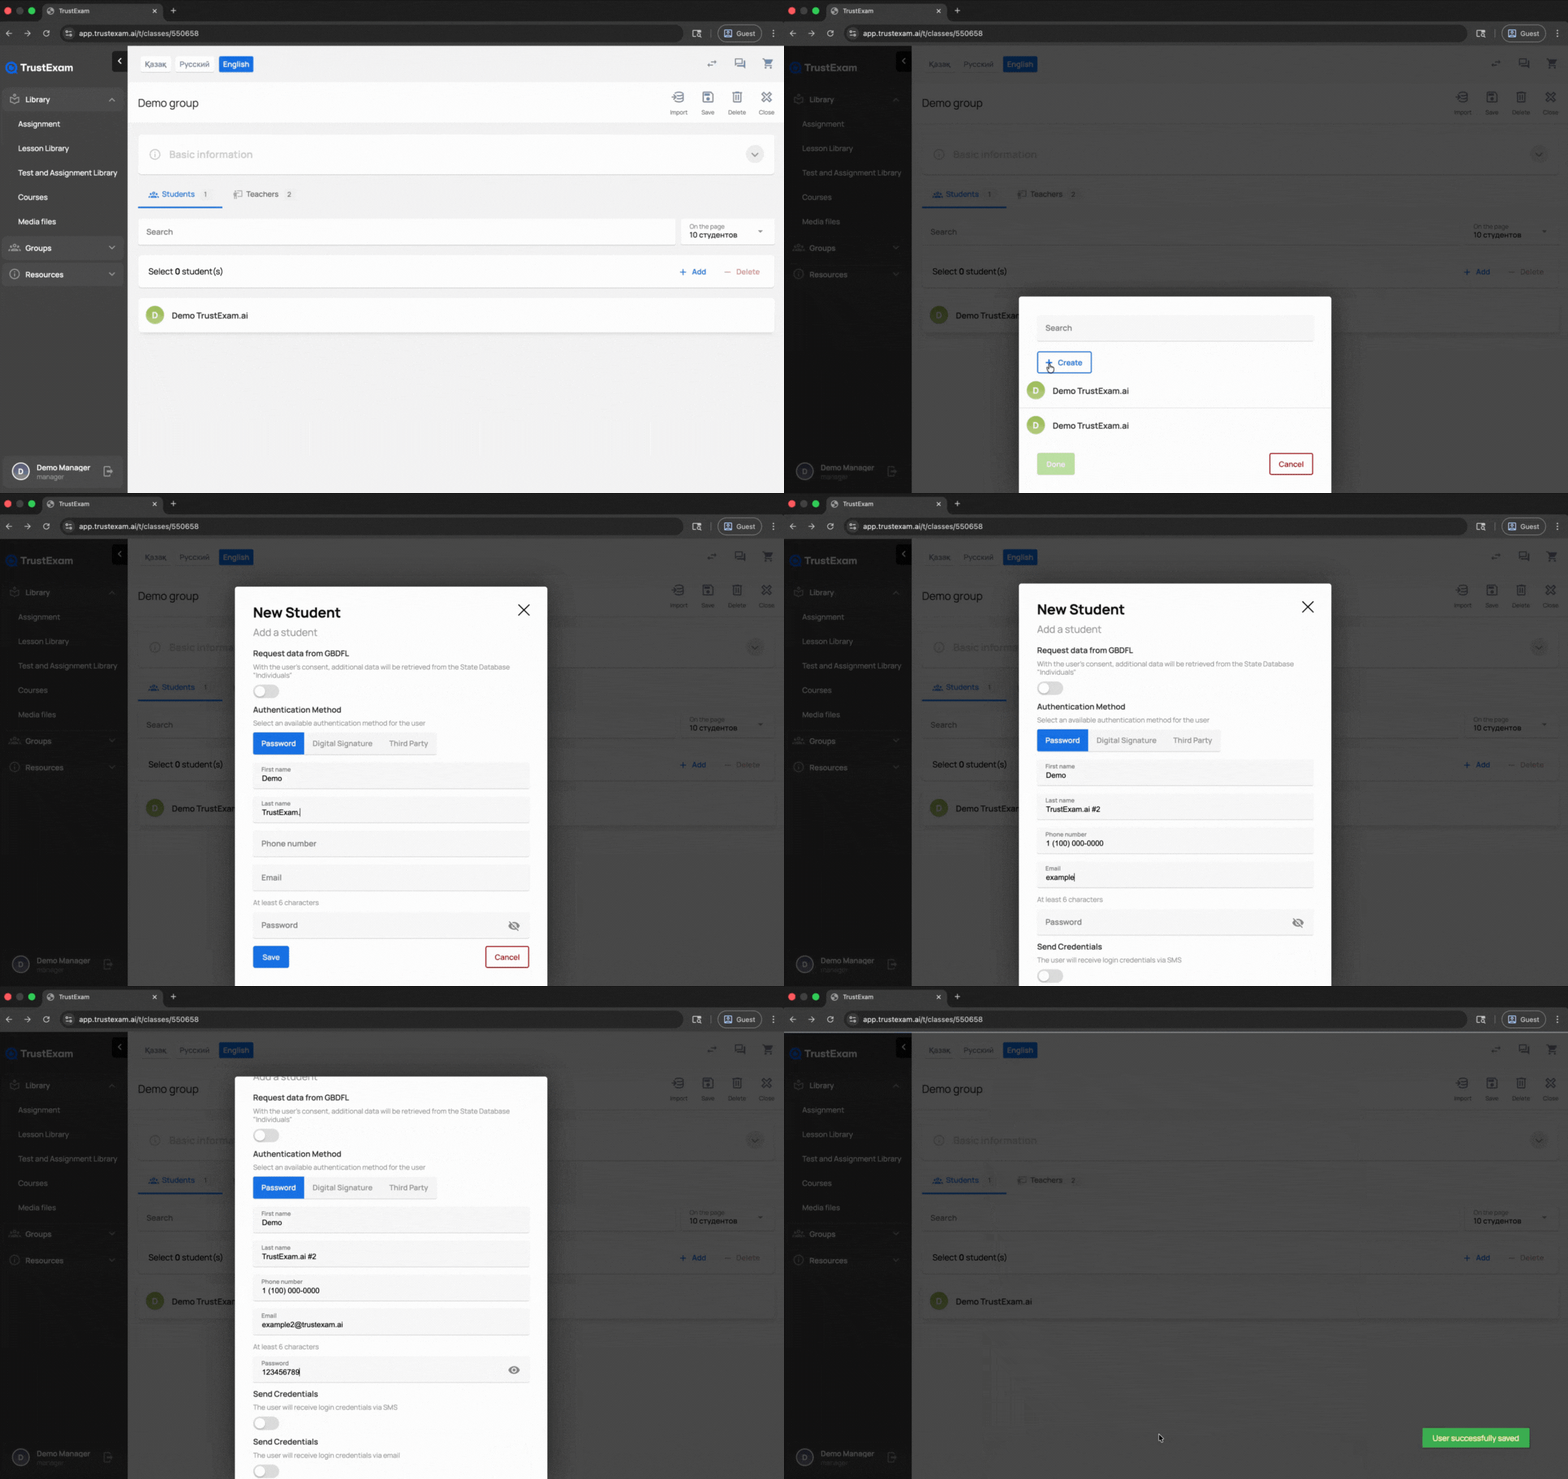
Creating a new test taker in a group
If you want to add a completely new person to your organization, you can create it by pressing the Create button and filling out their contact and login credentials.
Invitation Codes
Page Description
The Invitation Codes page displays all generated invitation codes and allows you to create, edit, or delete them. Invitation codes are used to control access to resources such as registrations, courses, assignments, or groups.
Invitation Code List
Each code in the list includes the following information:
Name – a human-readable name for the code
Description – additional details about the code’s purpose
Access Type – registration, course, assignment, or group
Remaining Activations – how many times the code can still be used
Creating a New Invitation Code
General Settings
When creating a new code, configure the following:
Type (required):
Registration – for registering new users
Course – provides access to a specific course
Assignment – grants access to a specific assignment
Group – adds users directly to a group
Code Name (required)
A readable title for the code (not the code itself).Description (optional)
Explains the purpose of the invitation code.
Restrictions
You can apply usage limitations to invitation codes:
Invitation Code – auto-generated system code
Maximum Uses – number of allowed activations
(0 means unlimited)Expiration Date and Time – after this moment, the code becomes invalid
Personal Invitations
For inviting specific users only:
Go to the Personal Invitations section.
Click Add.
Enter the user’s name and contact type (email or phone number).
When a code is sent as a personal invitation:
It is linked to the specified users
Other users will not be able to use the same code
Additional Management Features
Editing a Group
From the group details page, you can:
Change the group name or description
Add or remove participants
Delete the group (confirmation required)
Deleting an Invitation Code
Any invitation code can be deleted from the code list.
Once deleted:
The code becomes immediately invalid
It cannot be restored
Frequently Asked Questions (FAQ)
Can I change the access type of an invitation code after creation?
No. The access type cannot be changed. You must create a new code.
What happens if a code exceeds its usage limit?
The code is automatically deactivated. Further activation attempts will be rejected.
How do I add an instructor to a group?
When creating or editing a group, switch to the Instructor tab and select instructors from the list.
Can one invitation code be used for multiple groups?
No. Each invitation code is linked to a single resource (group, course, or assignment).