
Starting Test Creation
Log in to the system using a manager or administrator account.
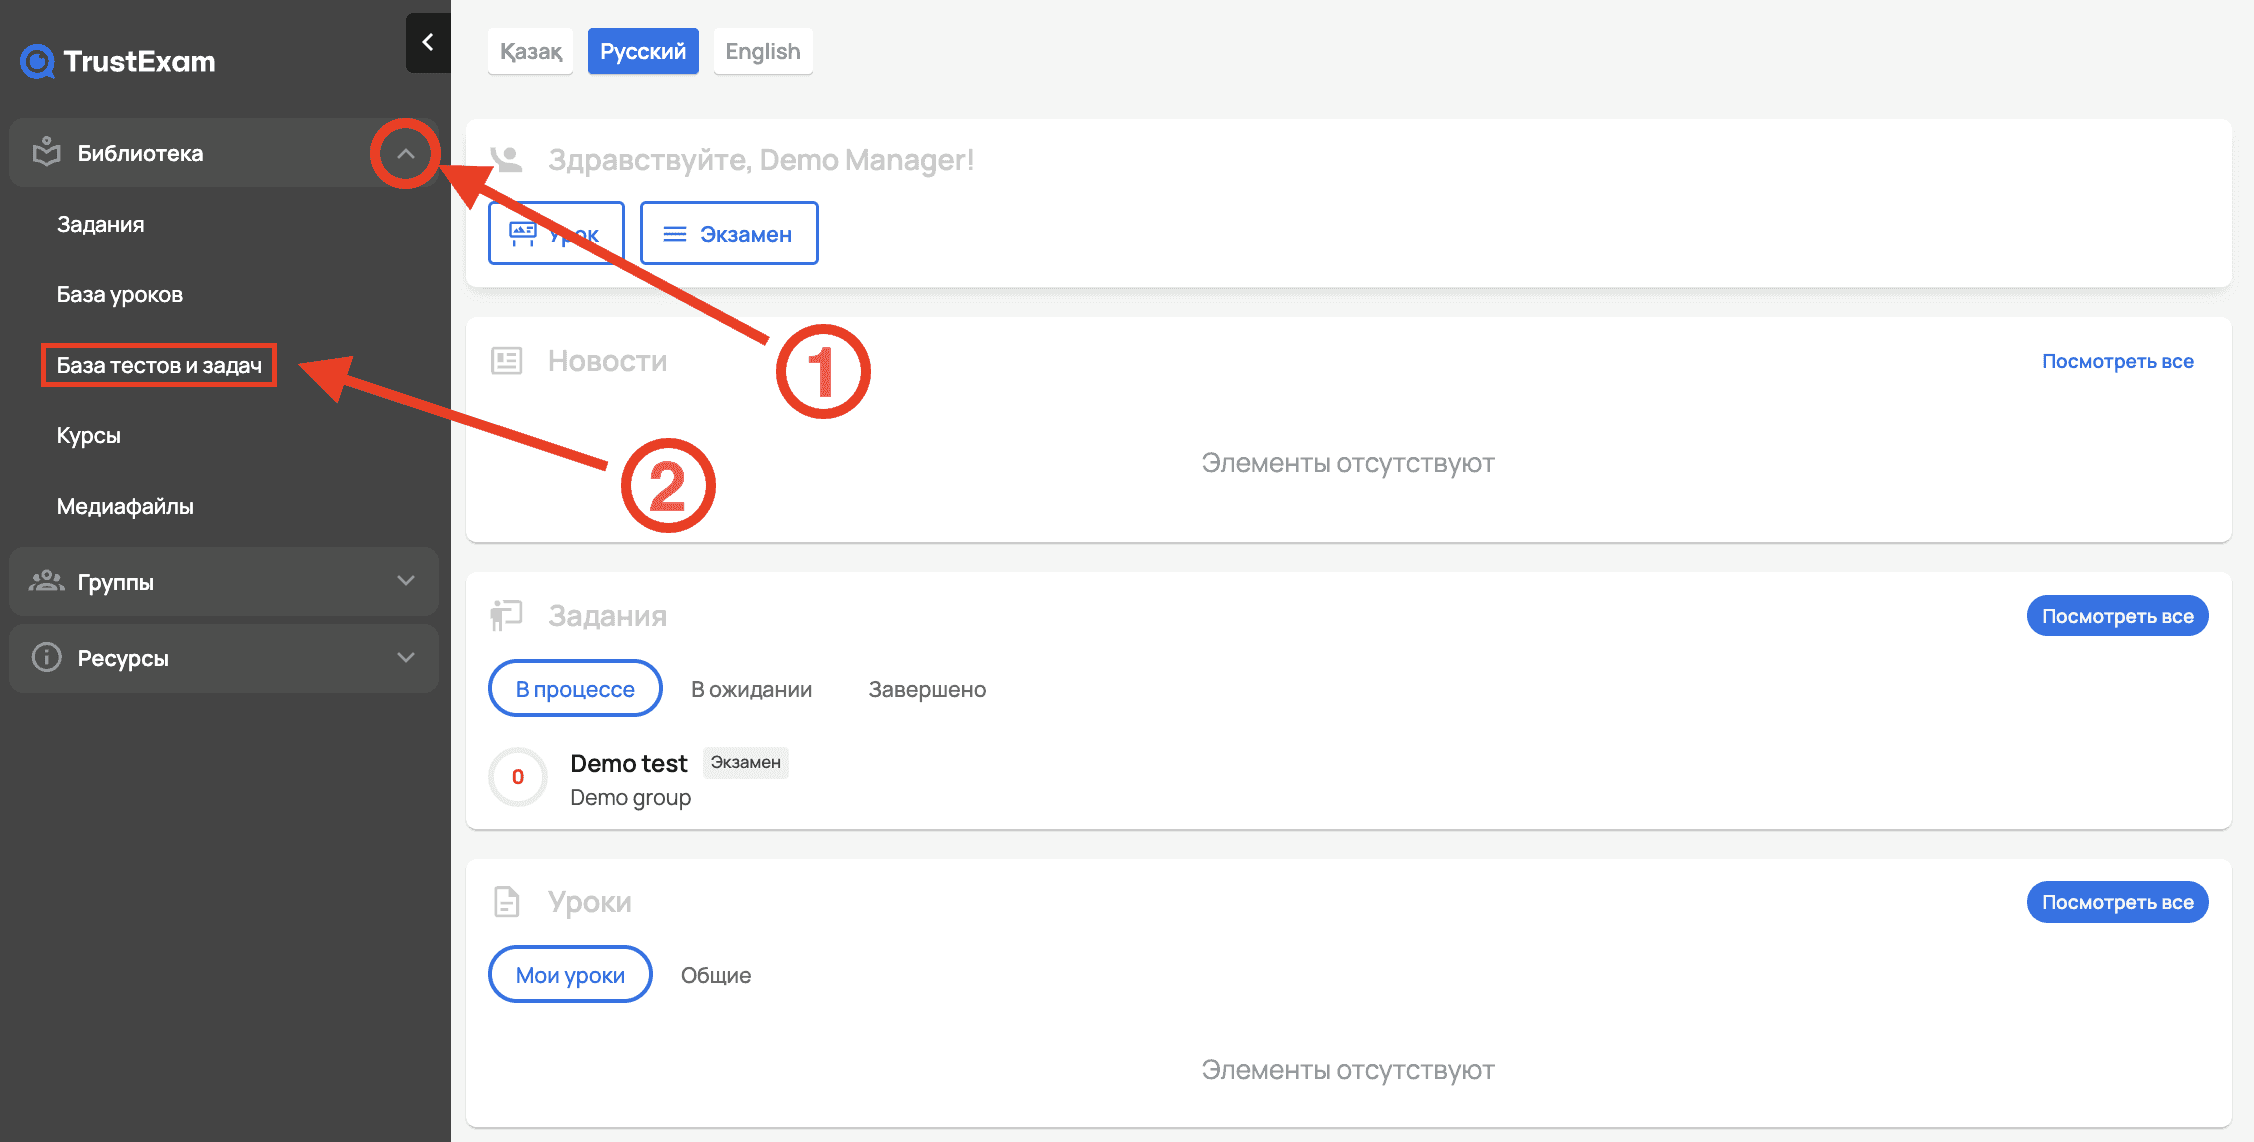
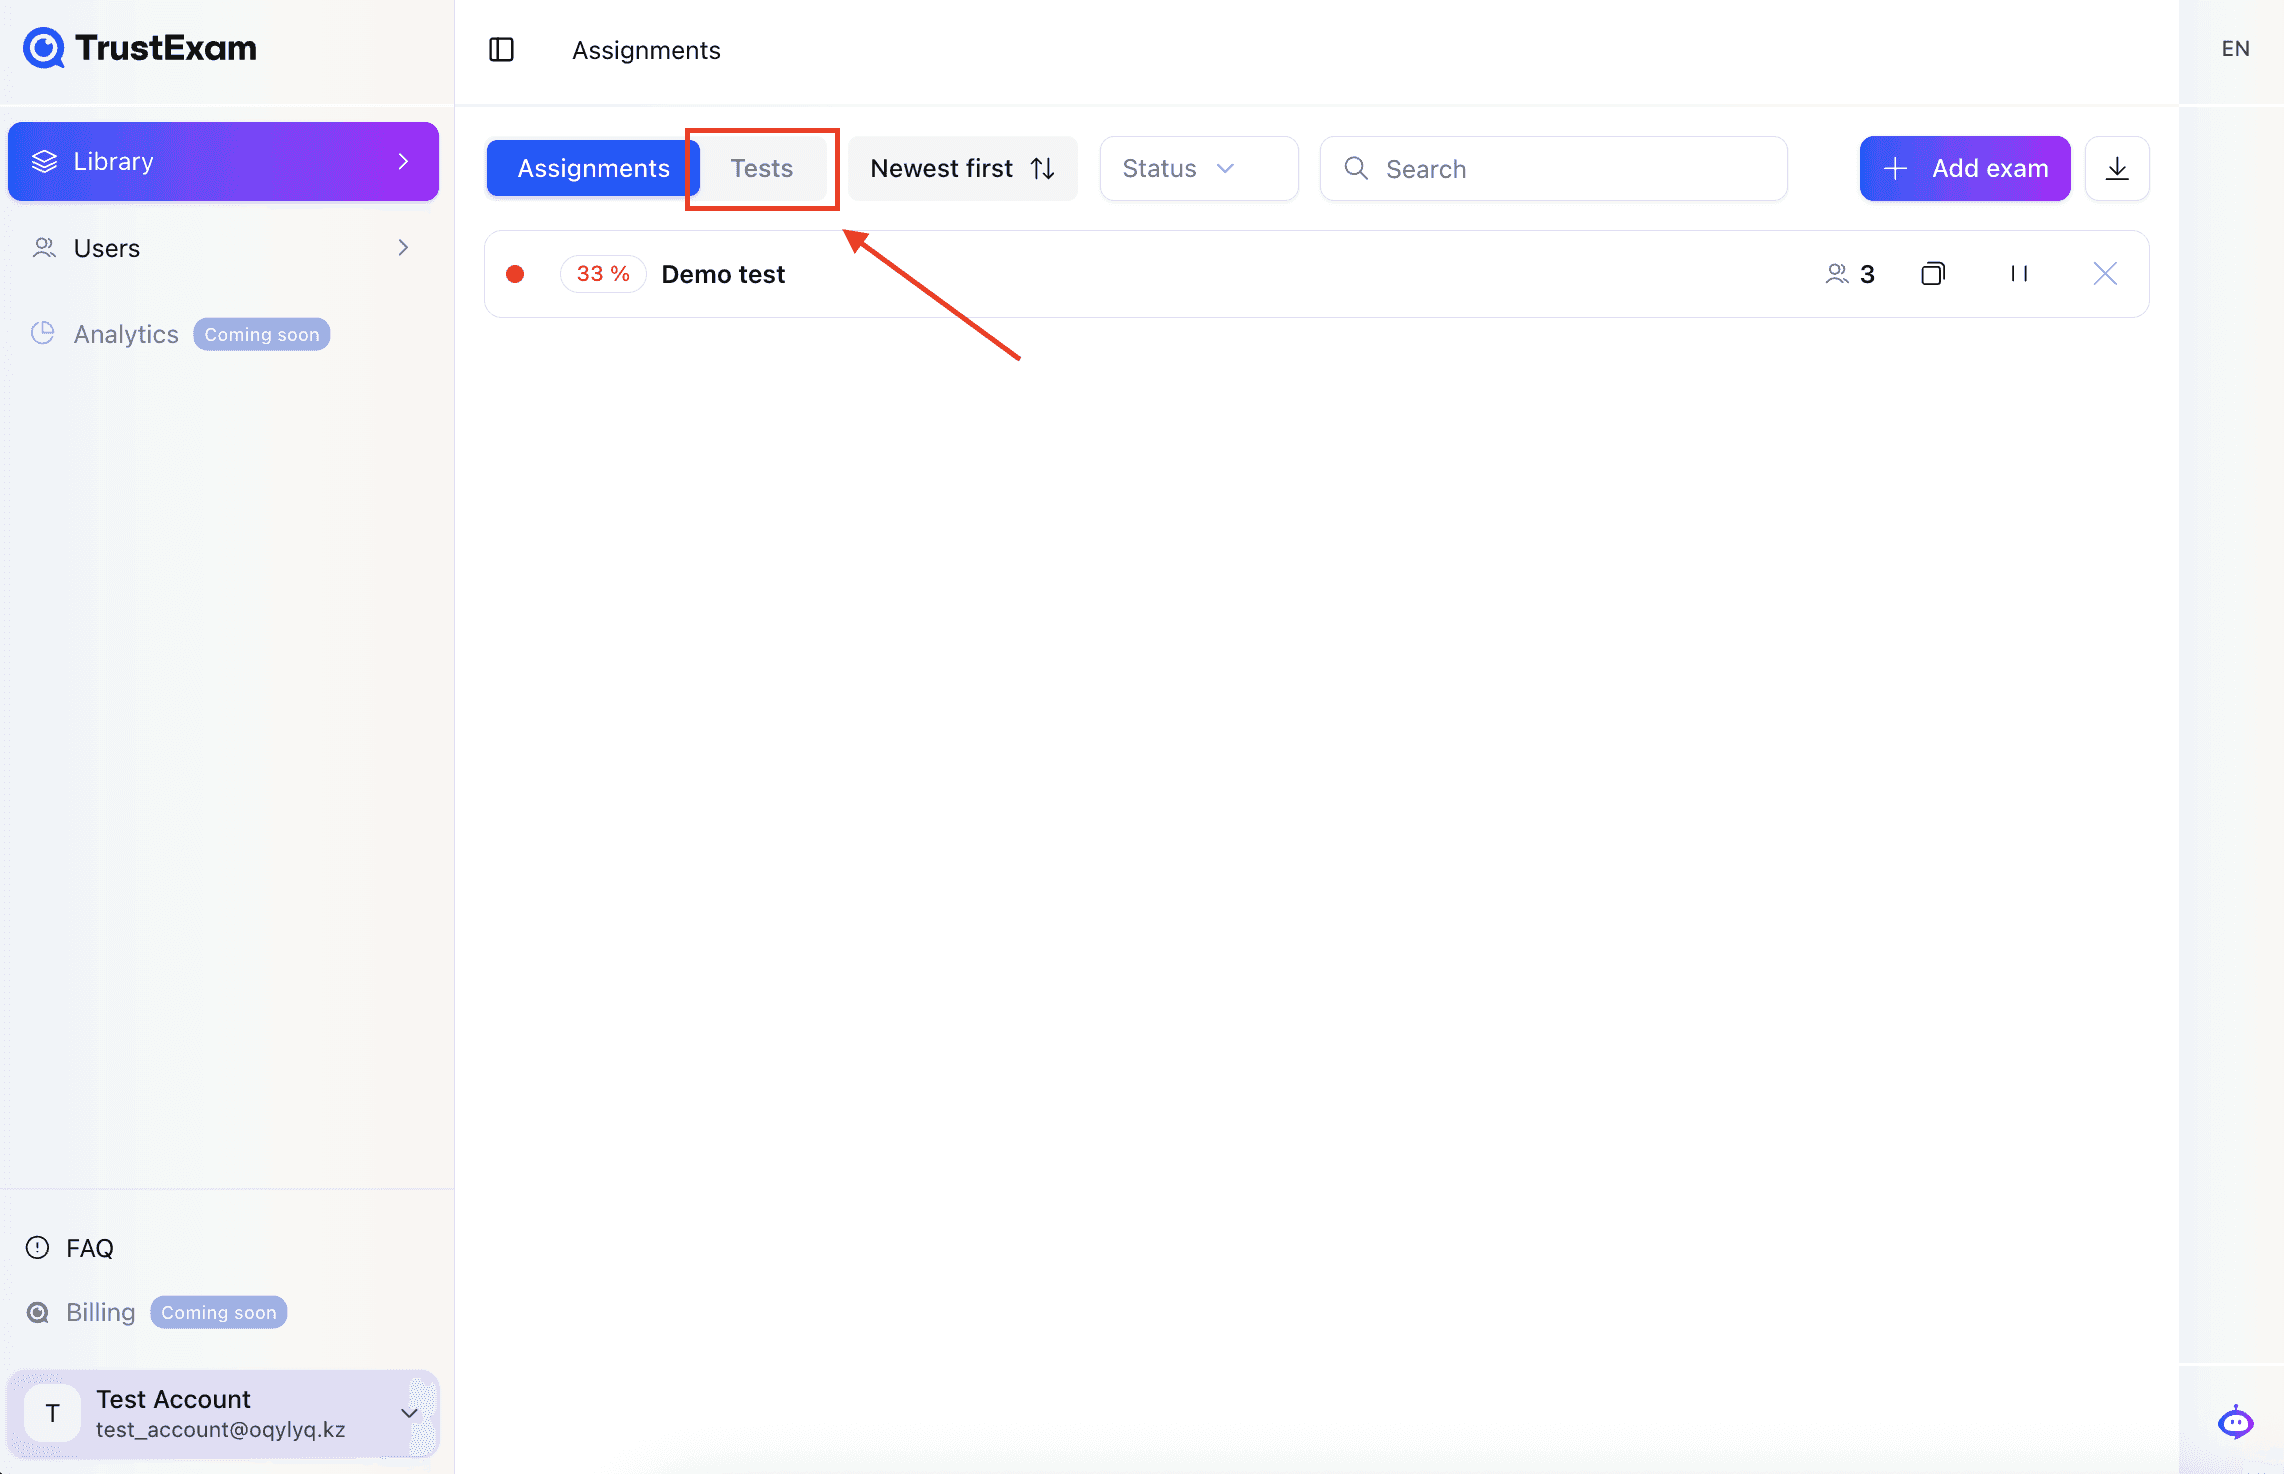
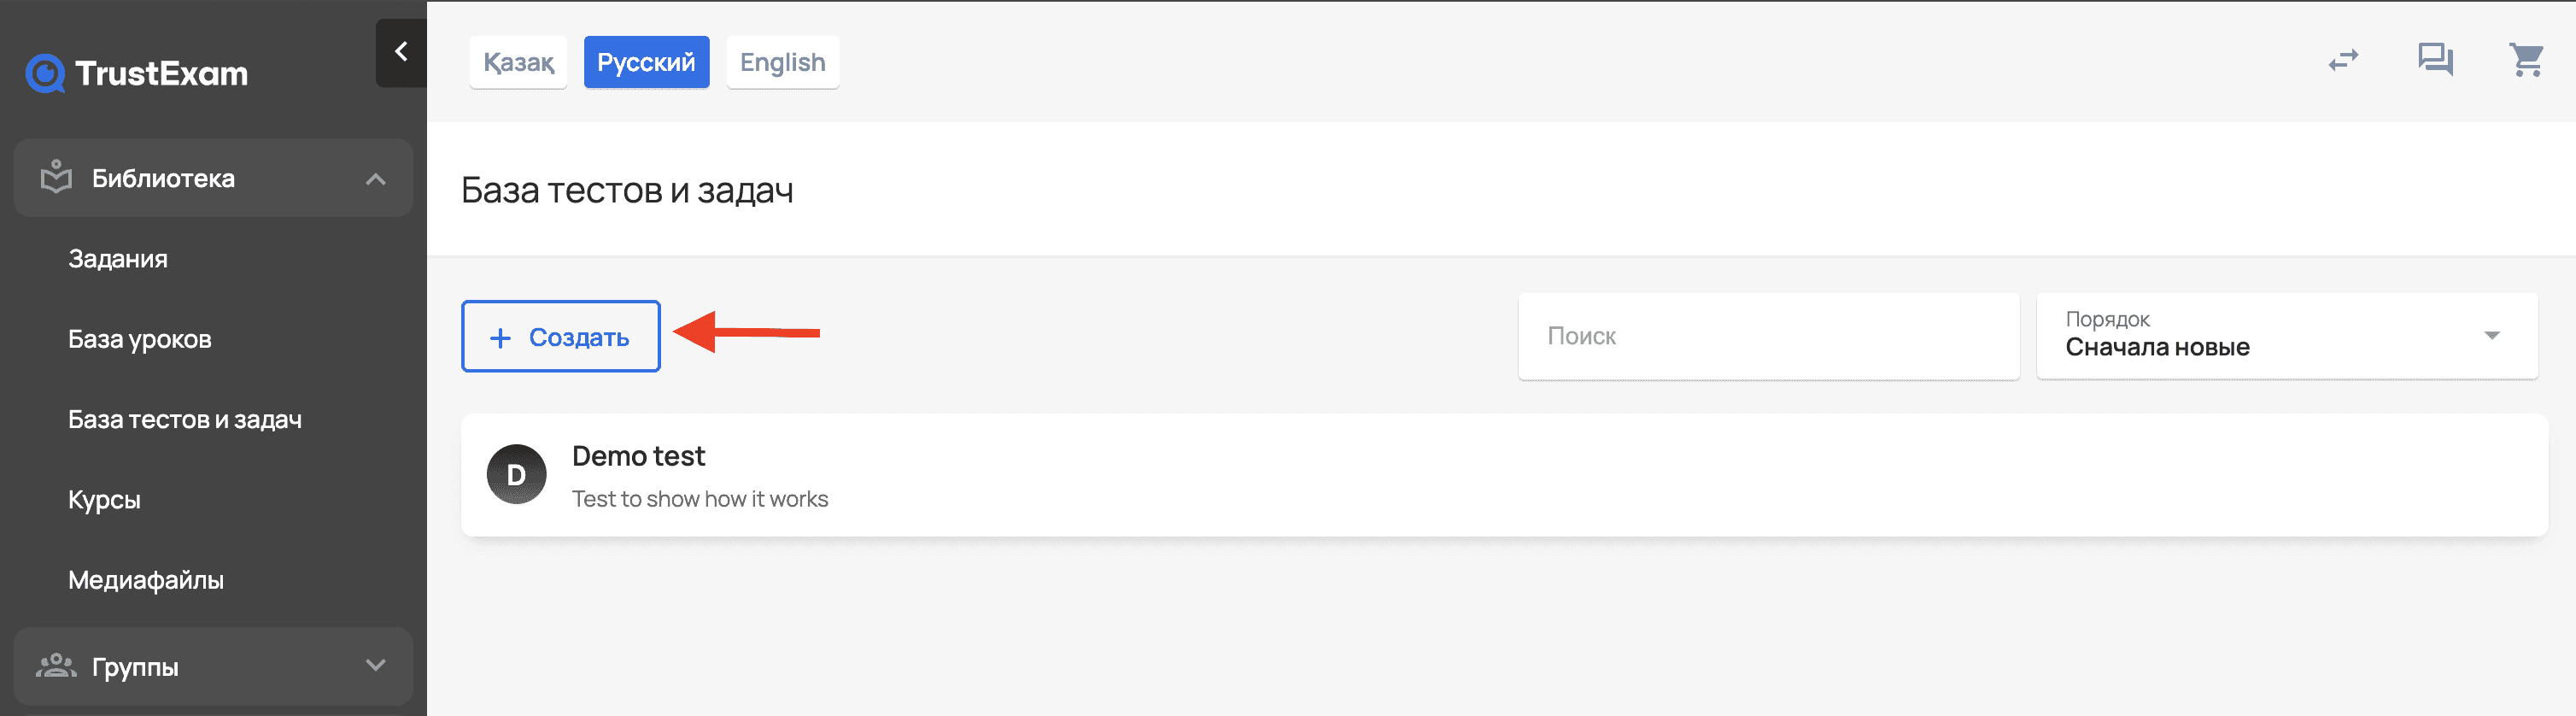
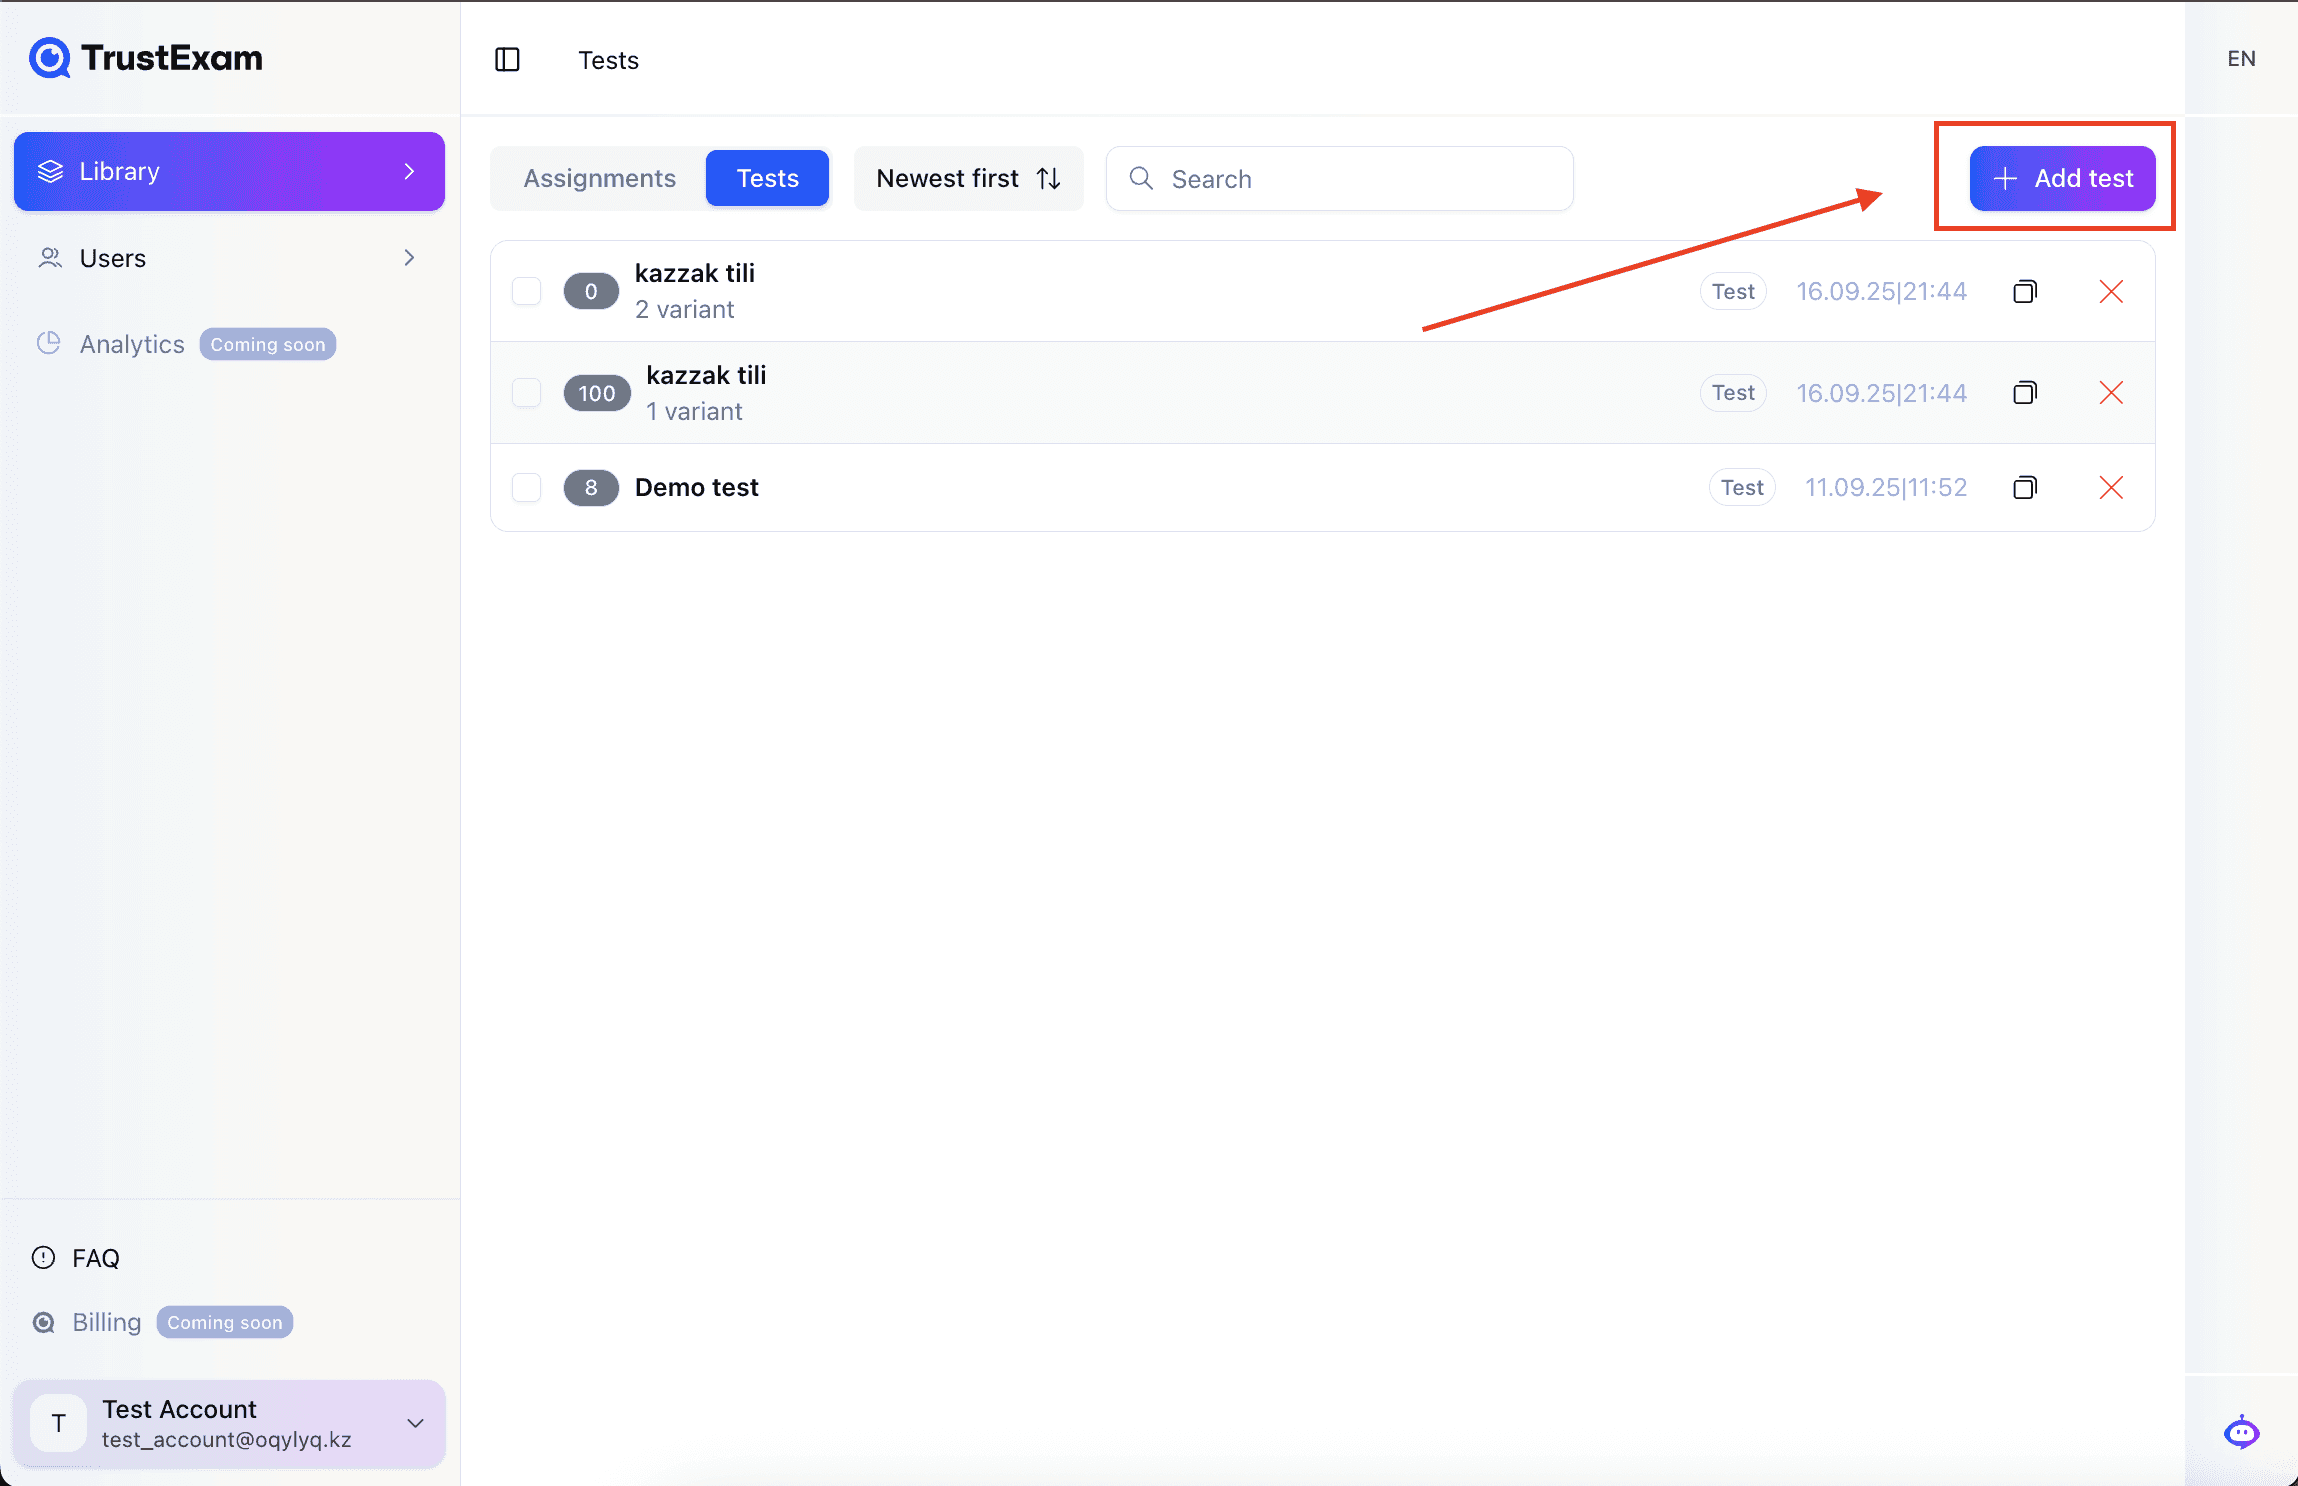
In the left sidebar, open the "Library" section.
Go to the "Tests" page.
Click the "Add test" button at the top of the page.
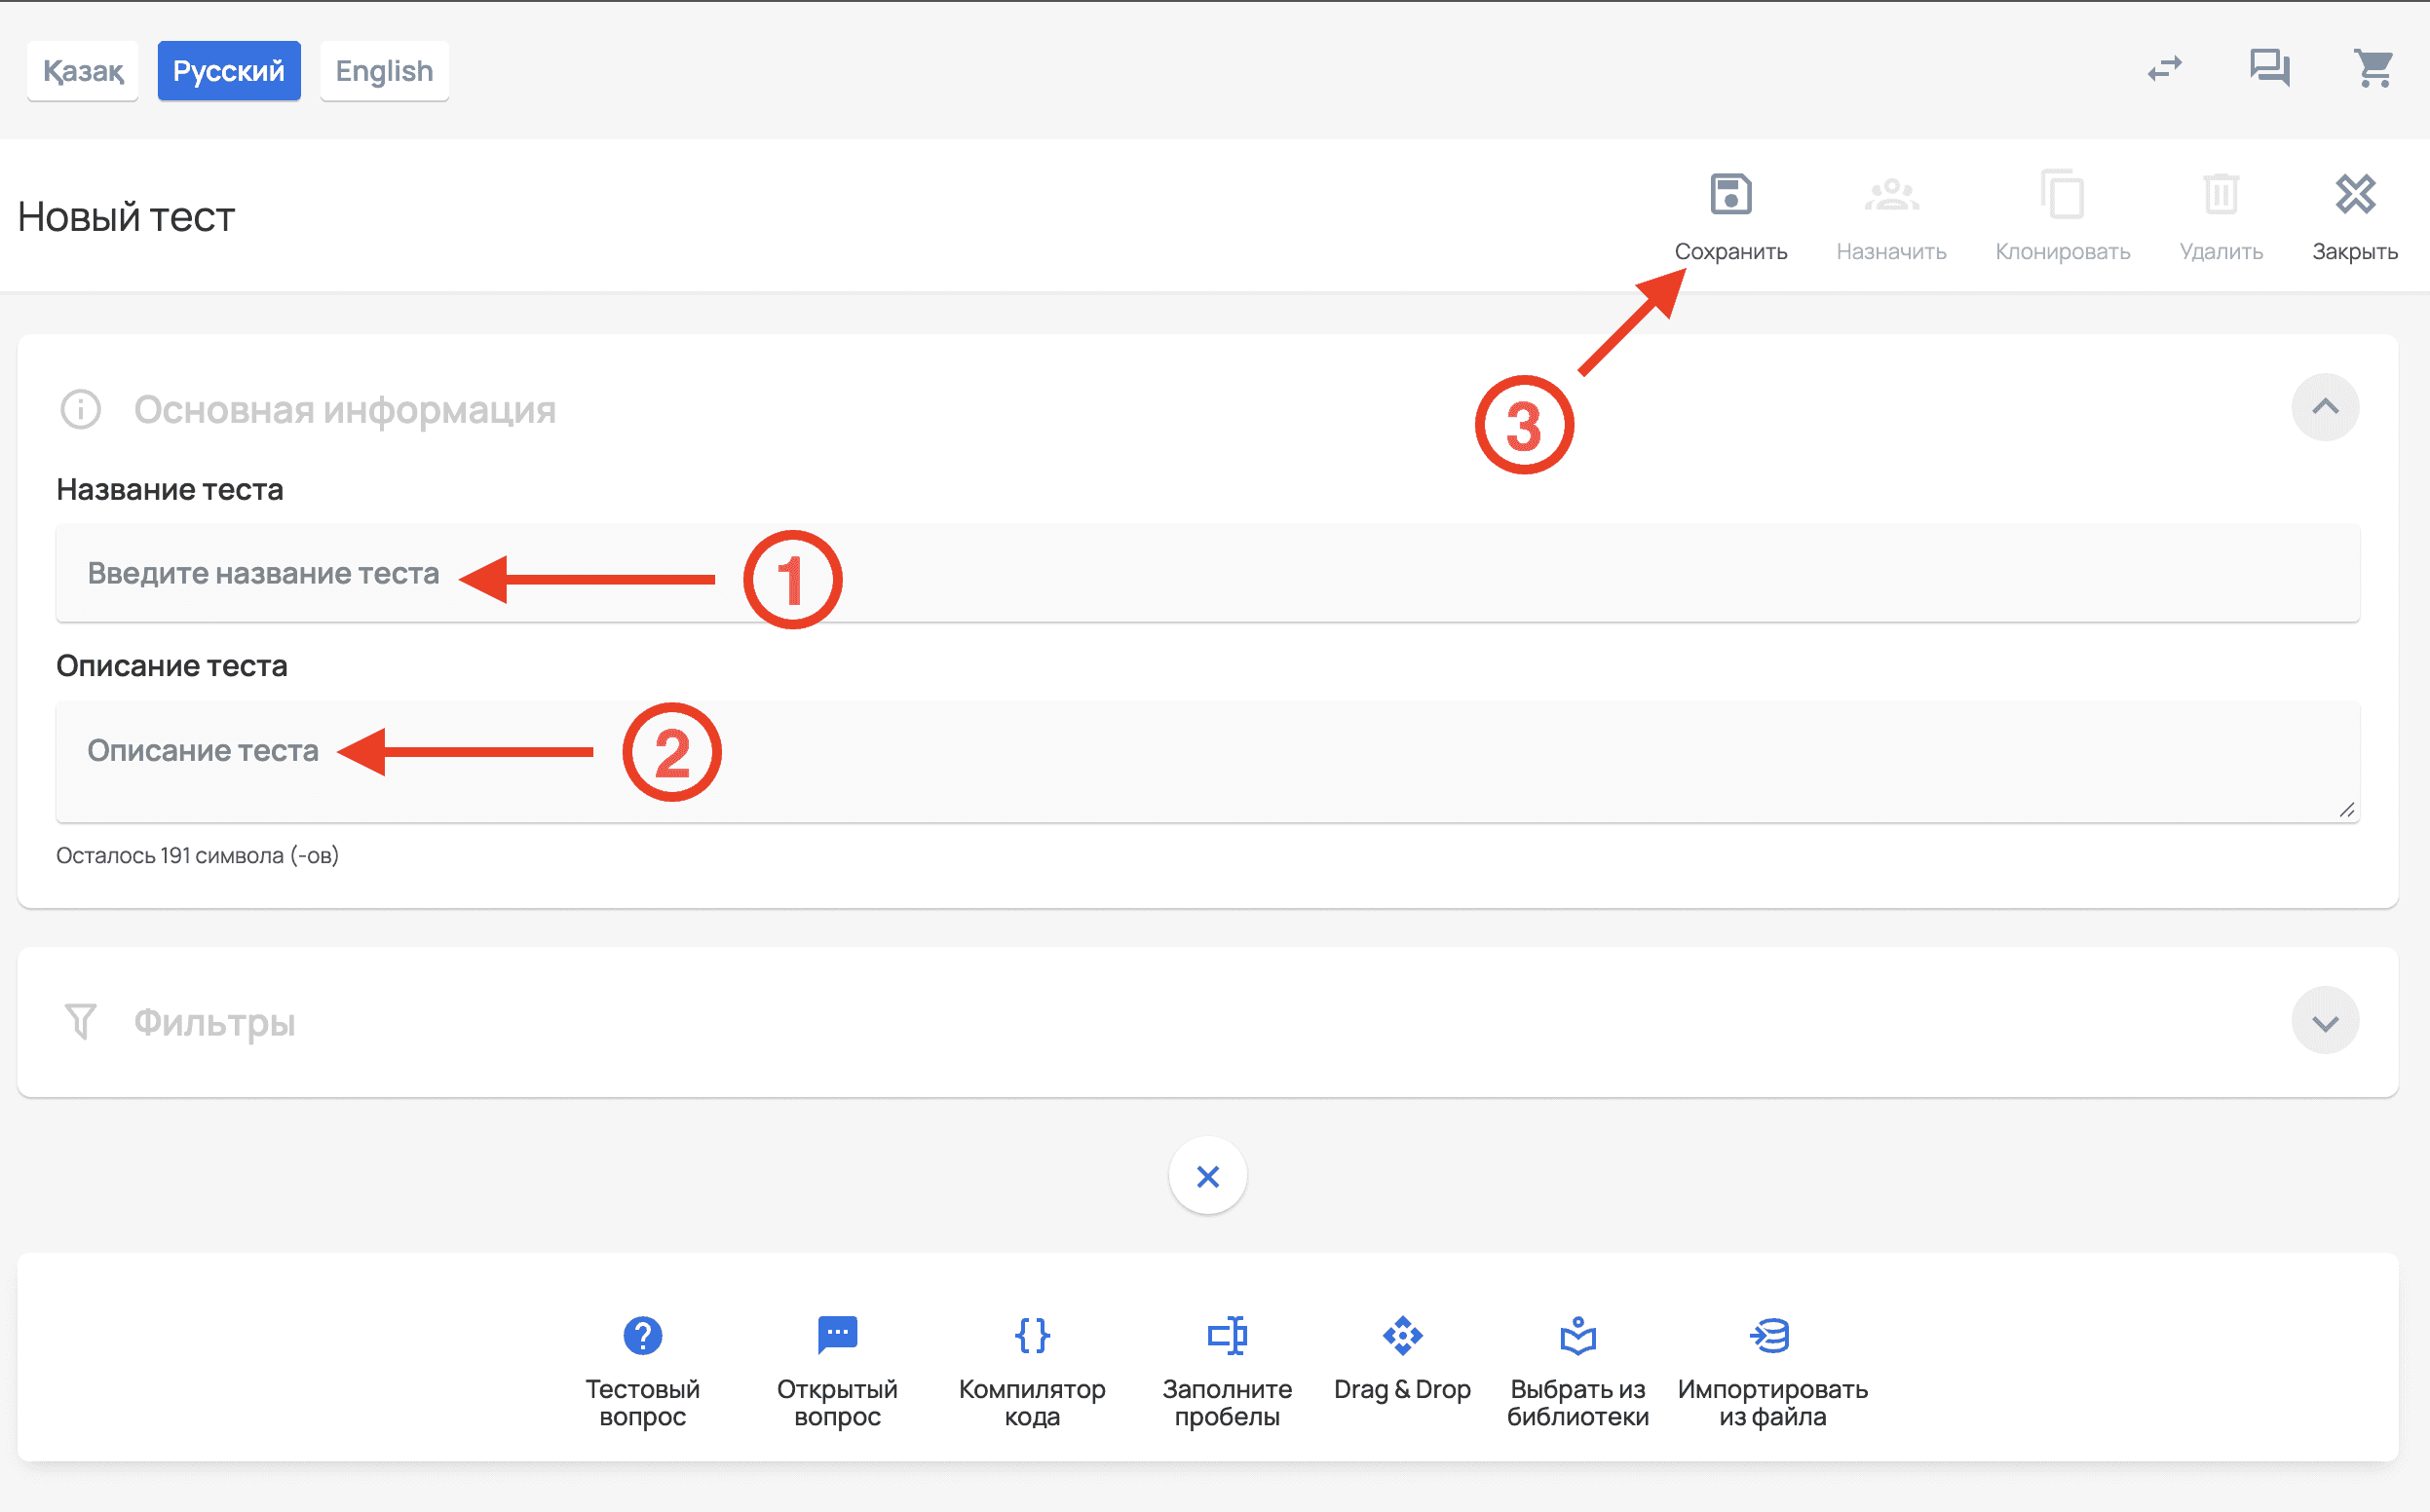
After this, the test creation interface will open. Before adding questions, specify the name of the test or exam, add a brief description, and click the "Save" button.
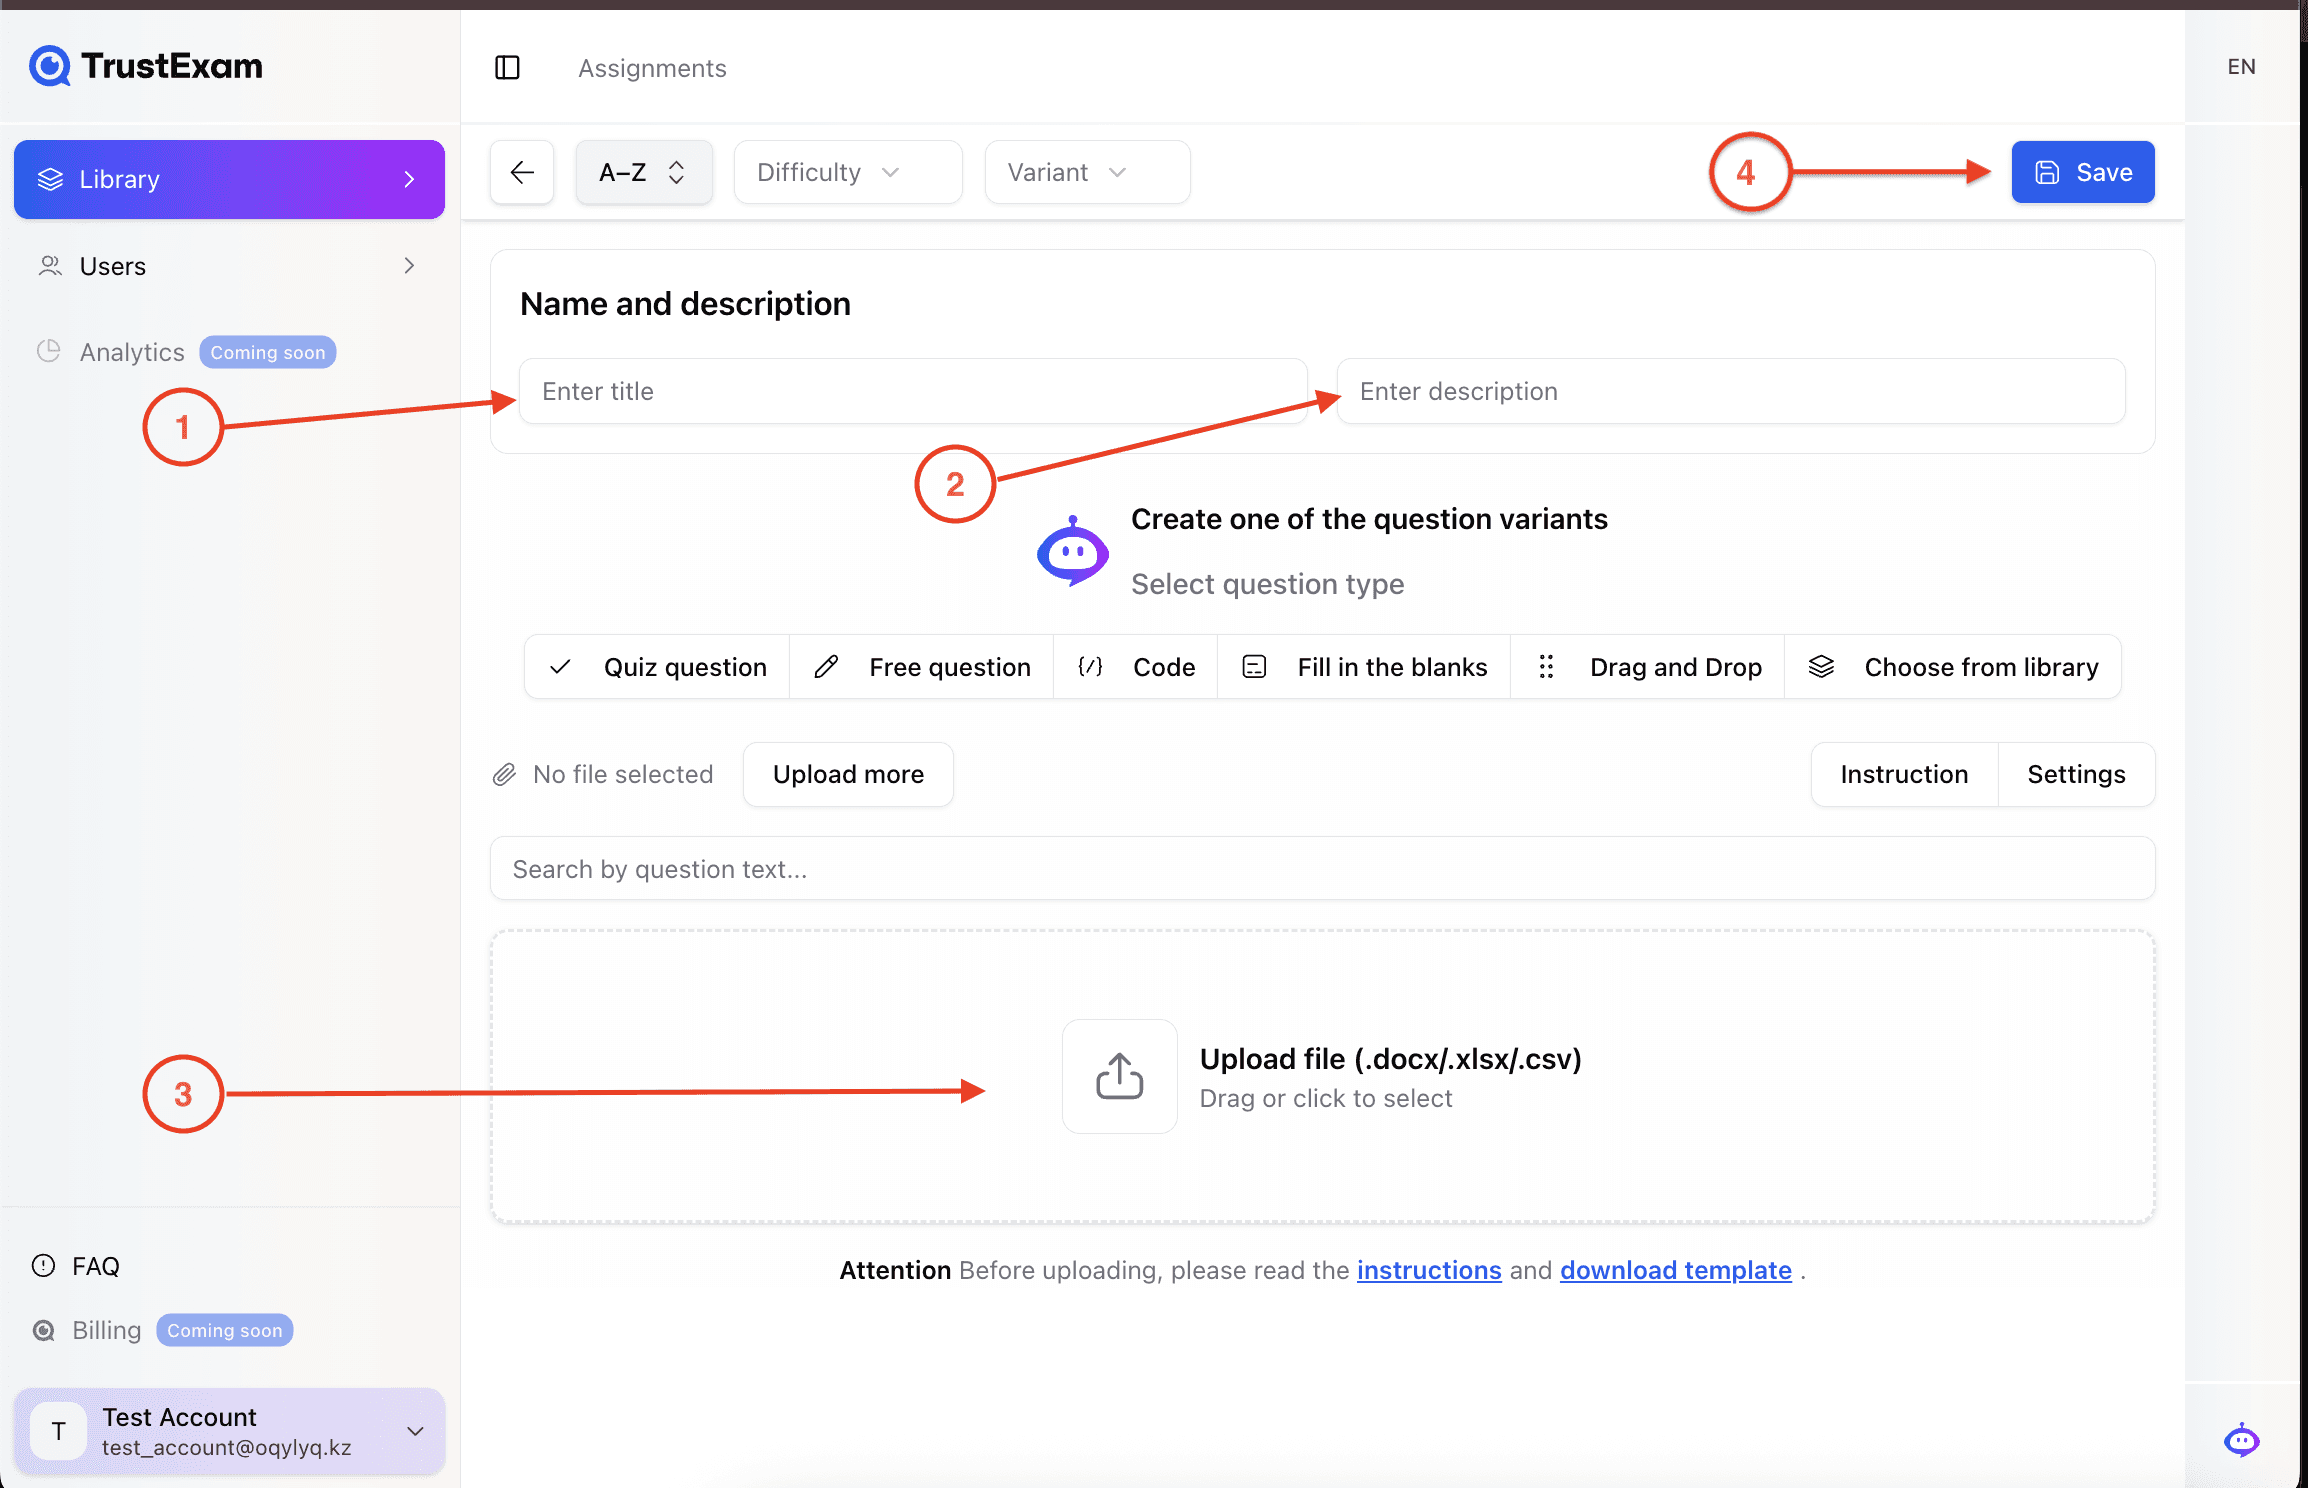
Adding Questions
Once the foundation of the test is created, you can proceed to adding questions. The system supports four types of questions, allowing for different assessment formats:
Multiple Choice Question
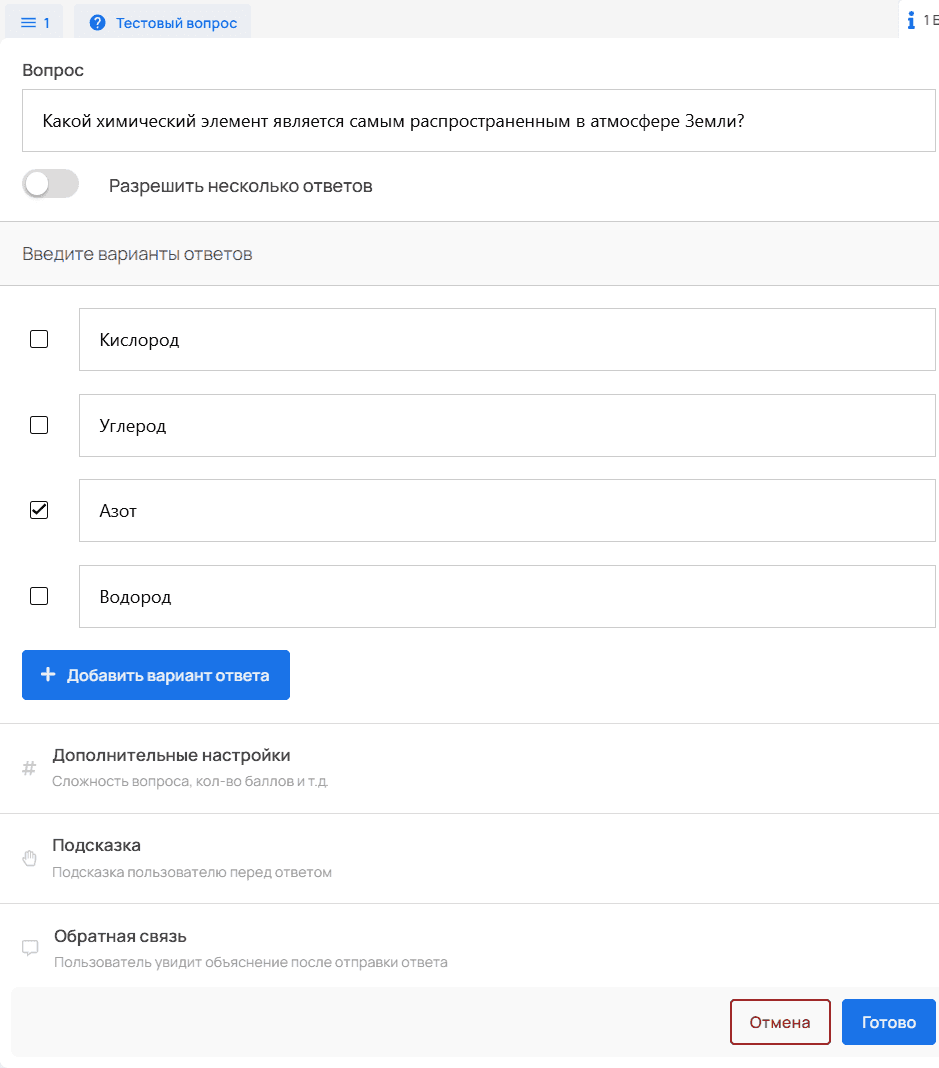
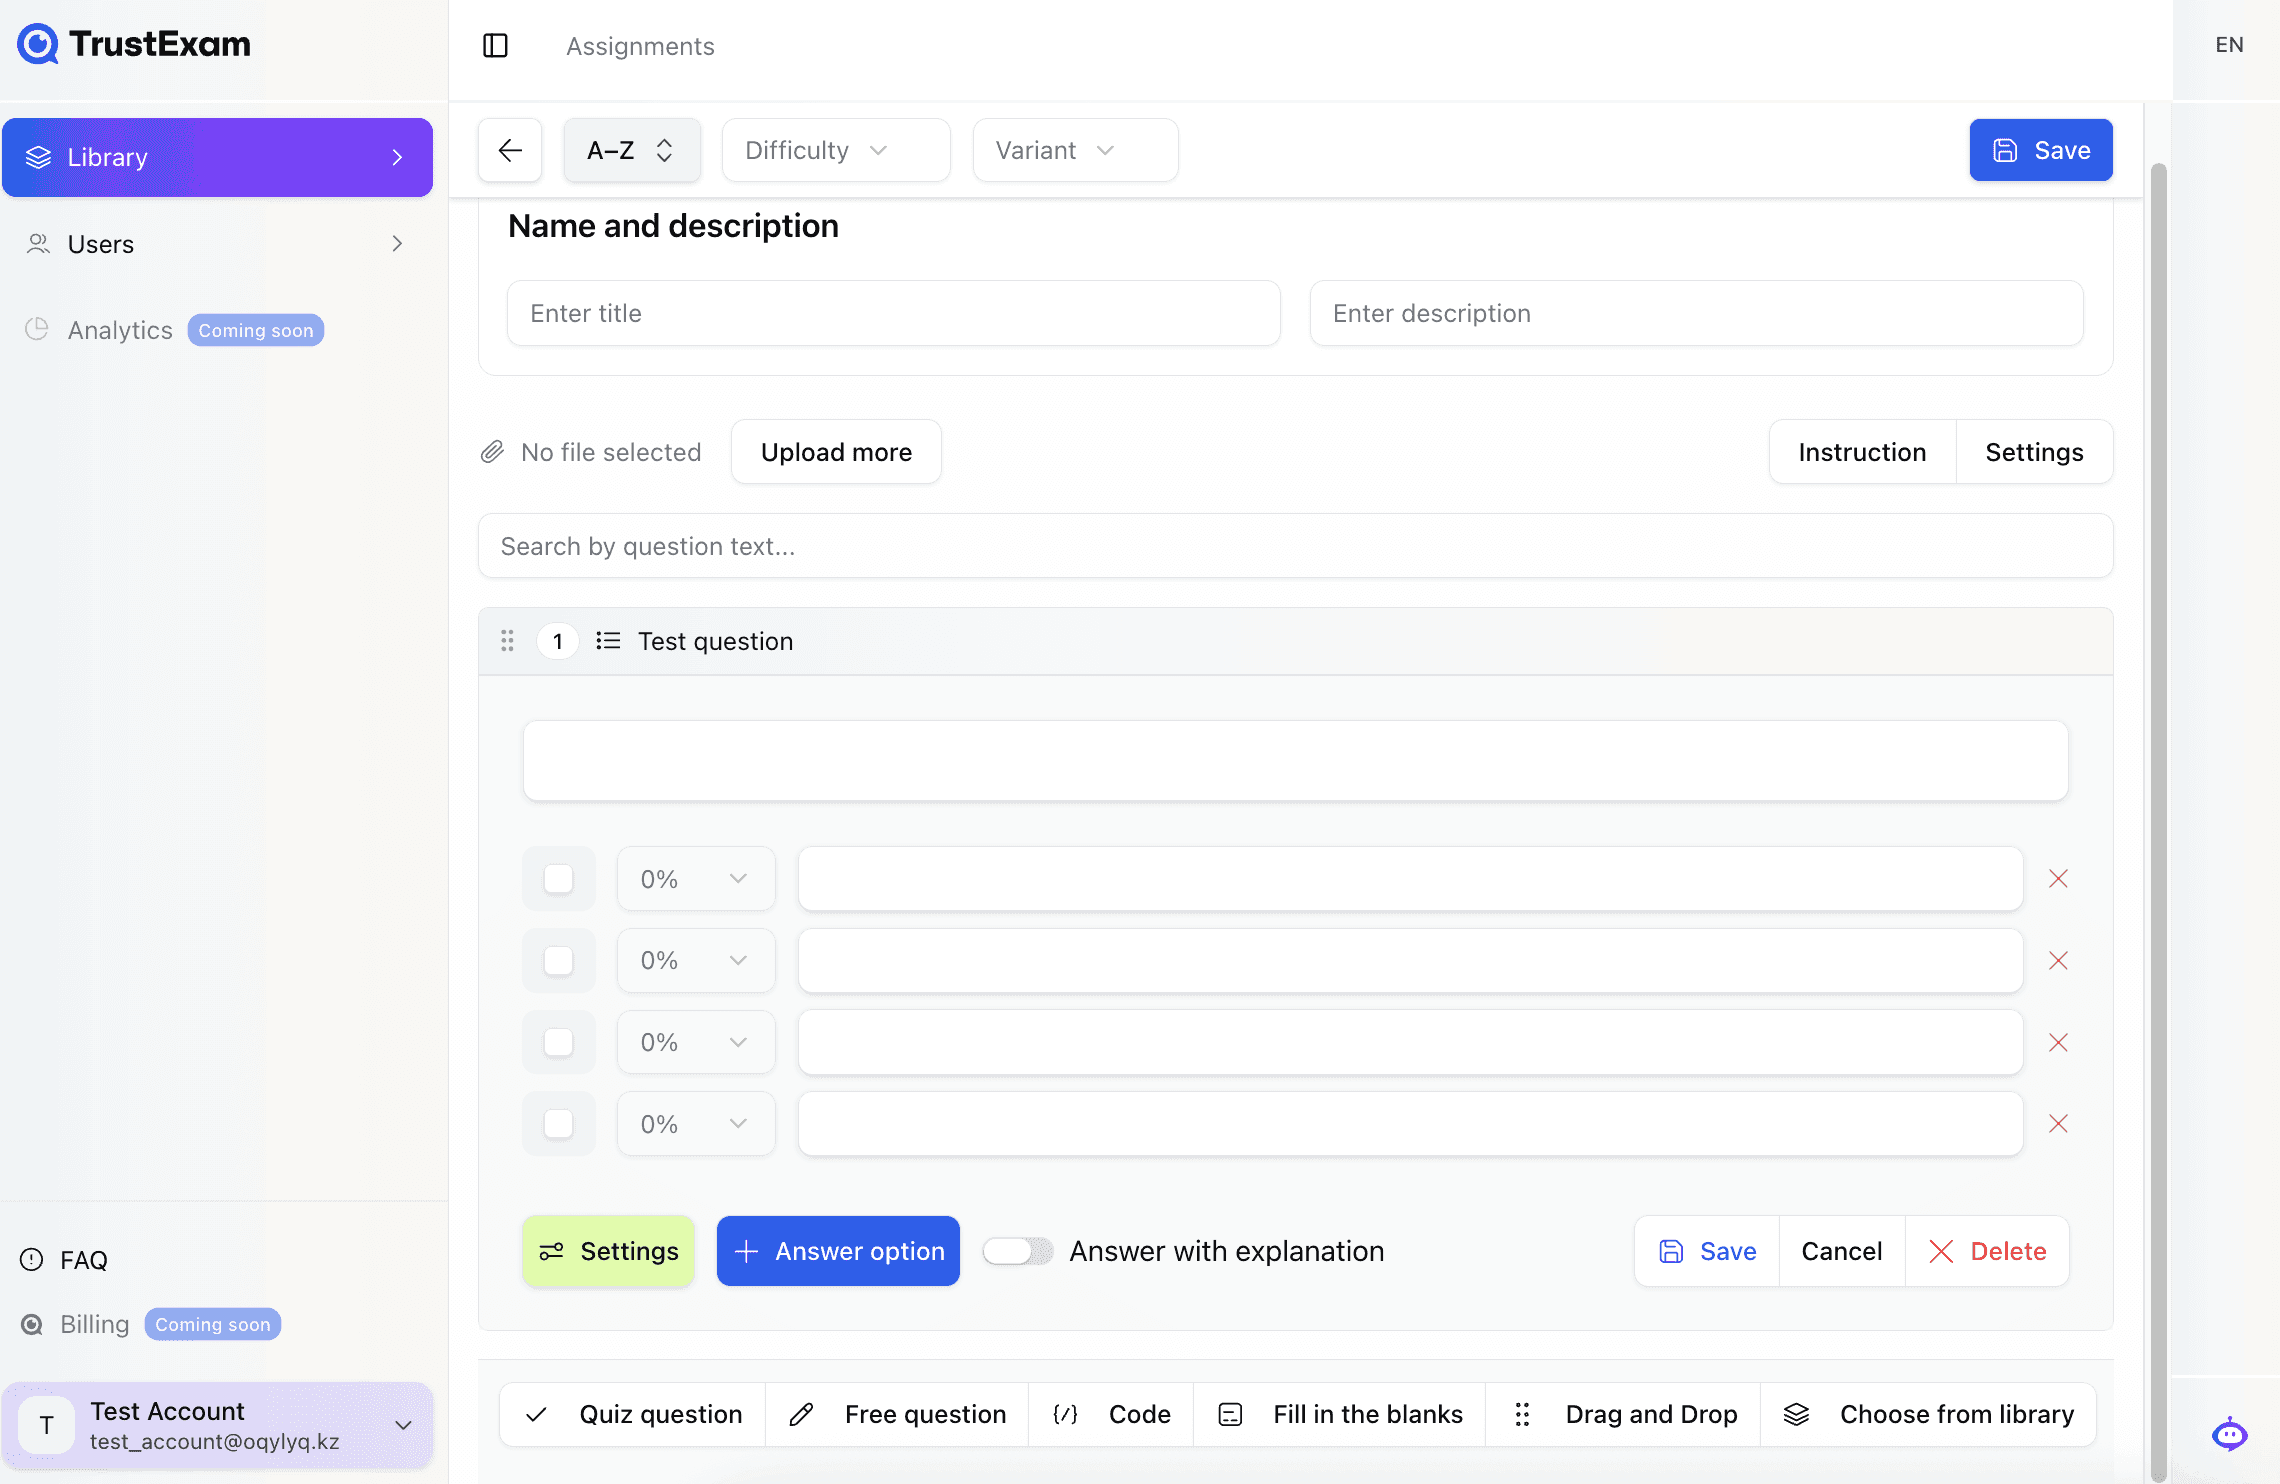
The multiple choice question is designed for tasks where one or several options are chosen from a list.For this type of question, you must:
enter the question text;
add answer options;
mark the correct options.
If necessary, you can allow multiple answers to be selected.
Open-Ended Question
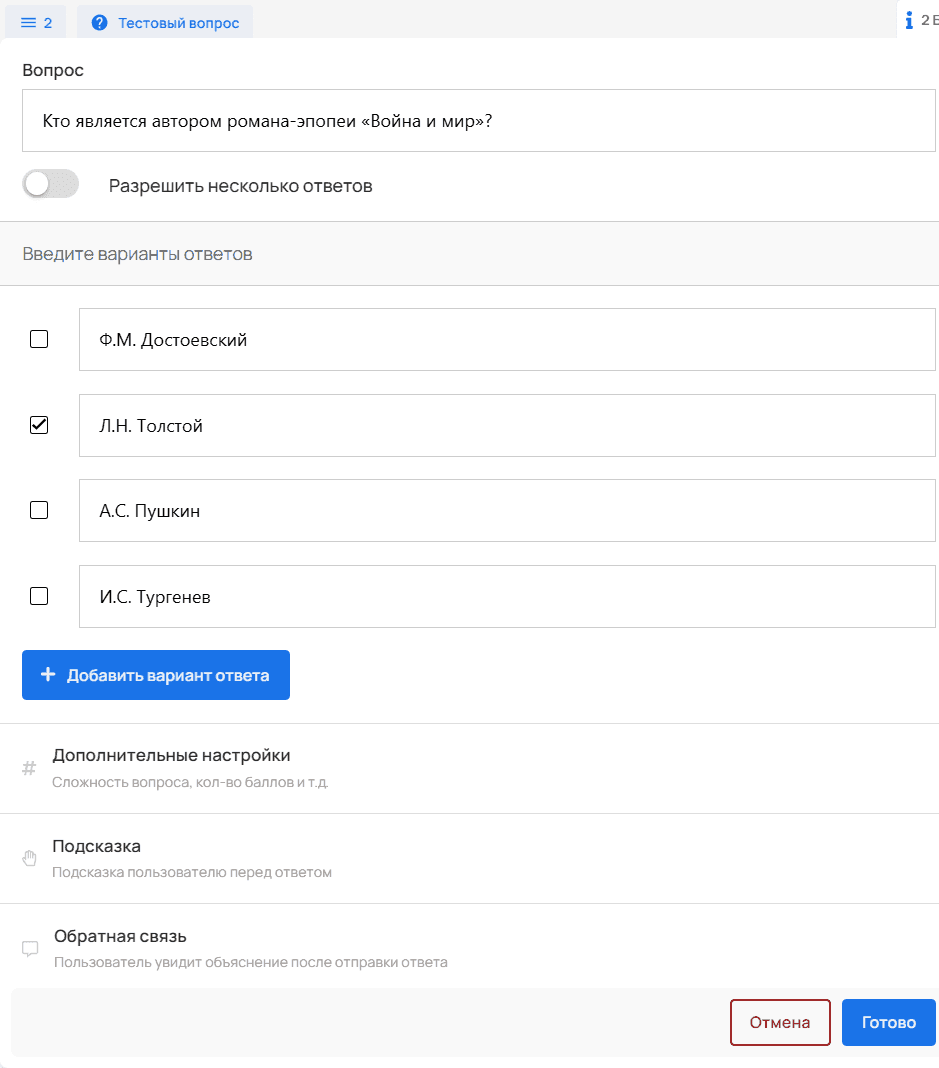
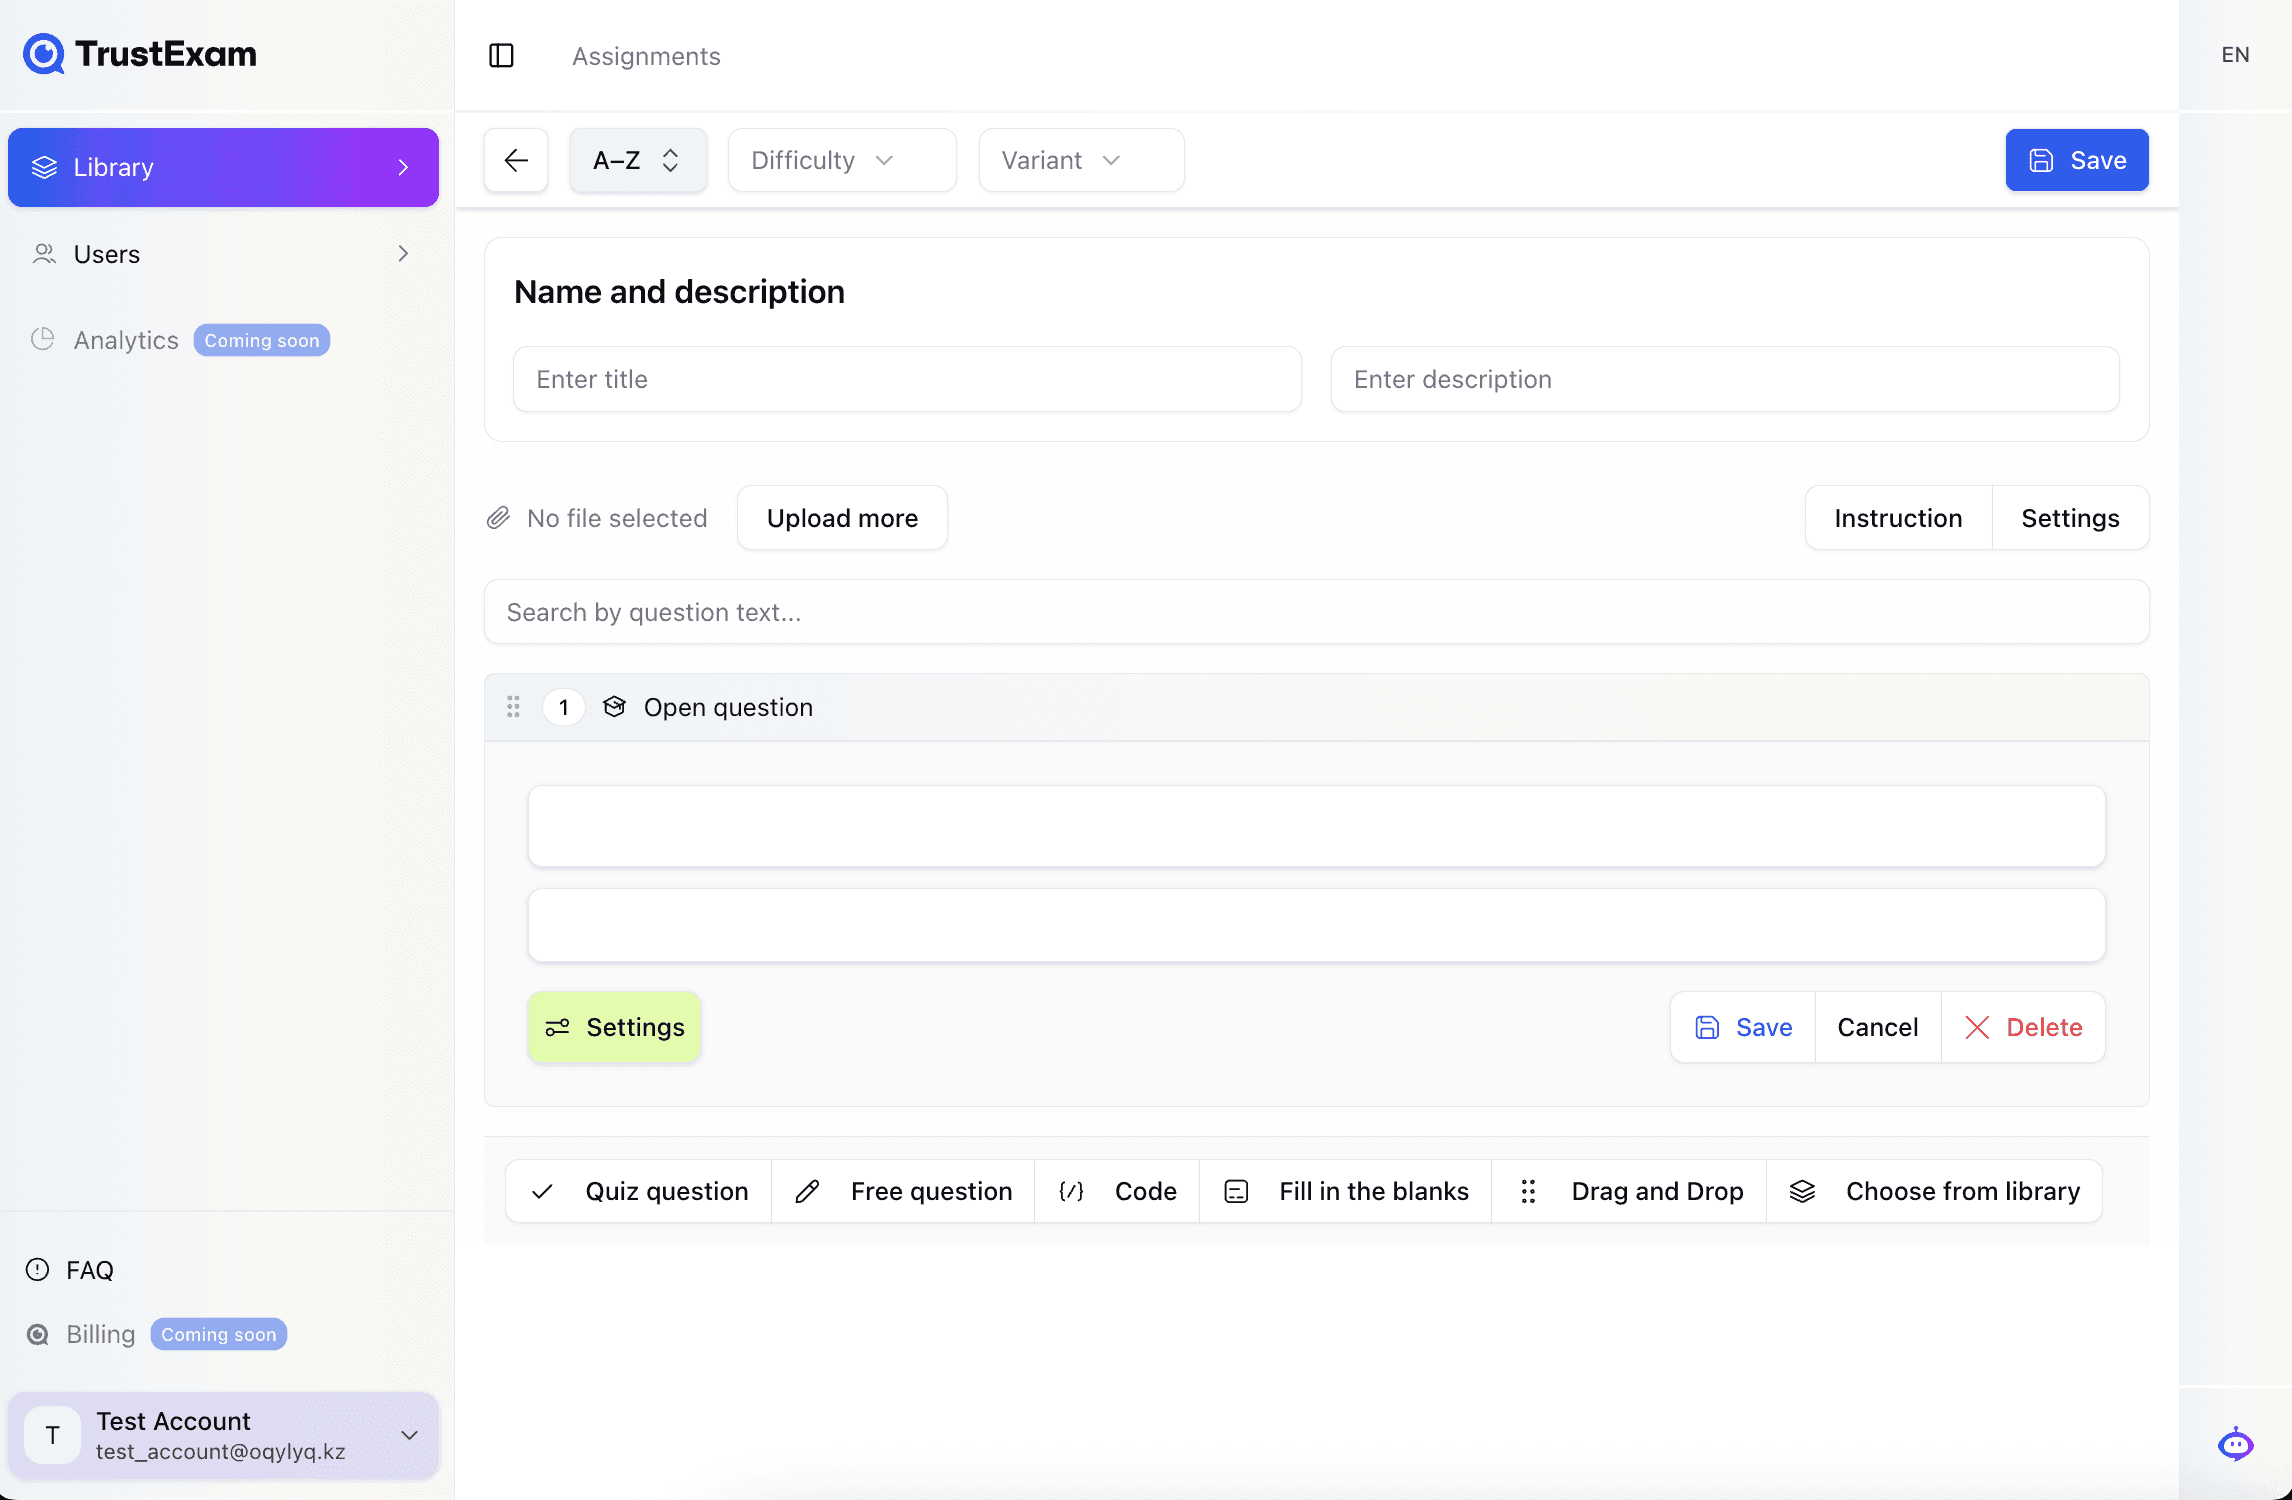
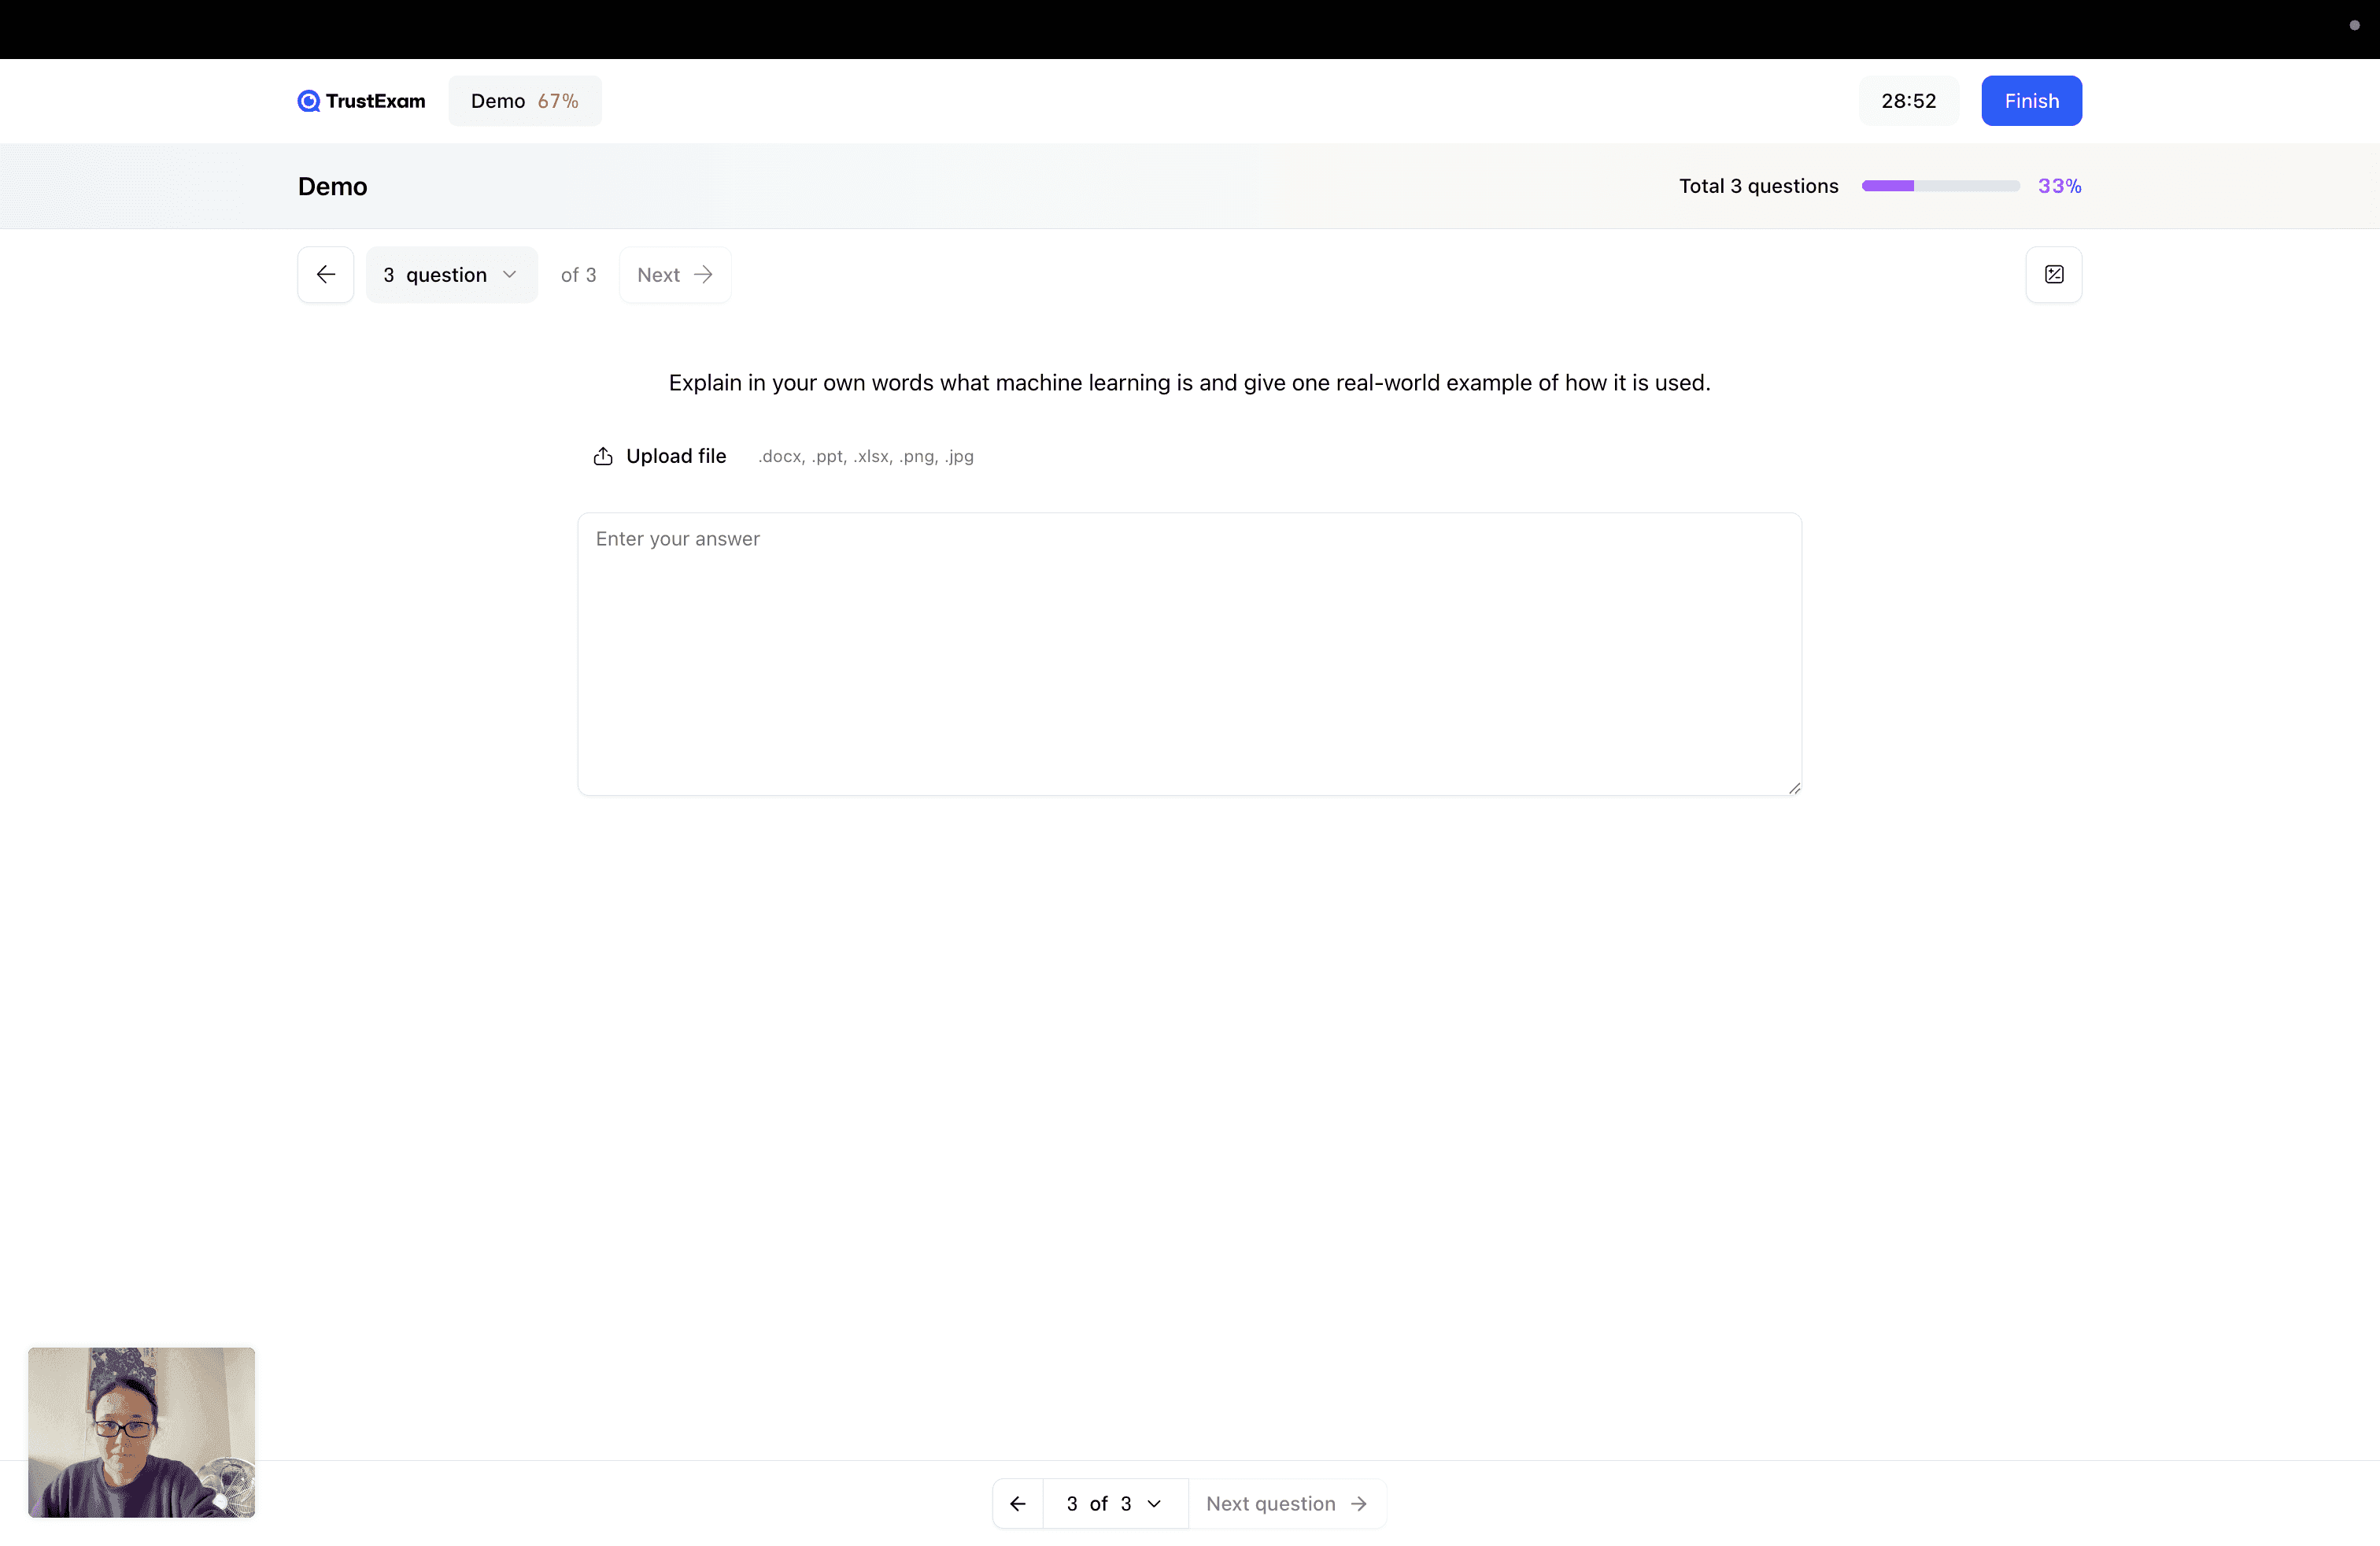
The open-ended question is for tasks where the student enters a detailed text response in free form. The student's response is not checked automatically and is intended for subsequent review by a teacher/manager.Additional Features
The following parameters are available for open-ended questions:
Allow file attachments (the student can upload files from their testing device or another device by scanning a QR code);
Text uniqueness check (anti-plagiarism).
Code Compiler Question
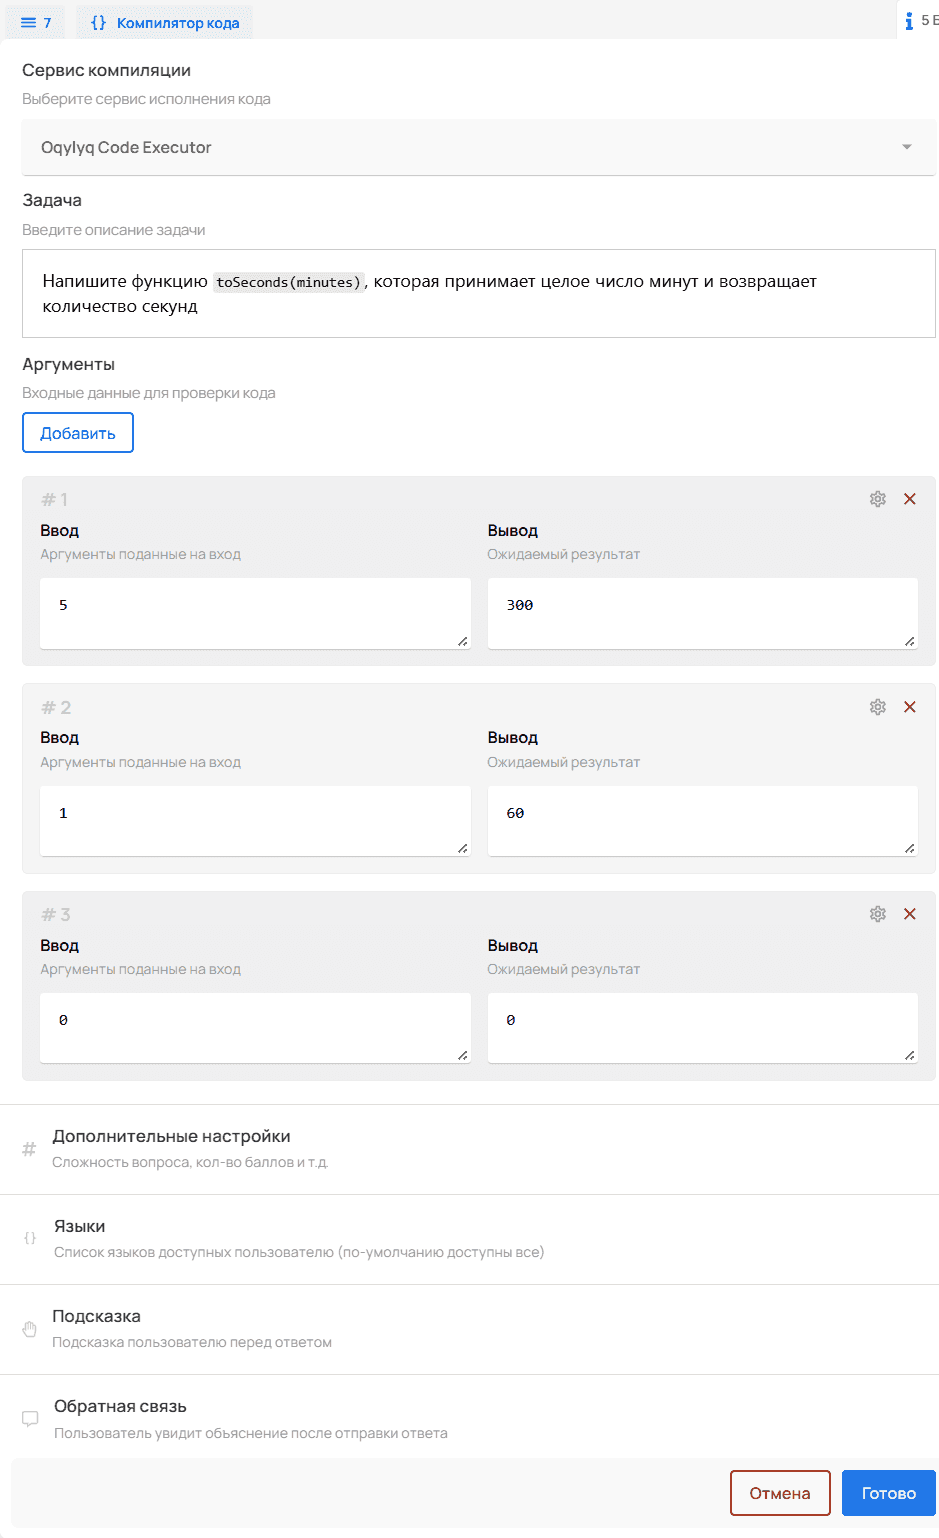
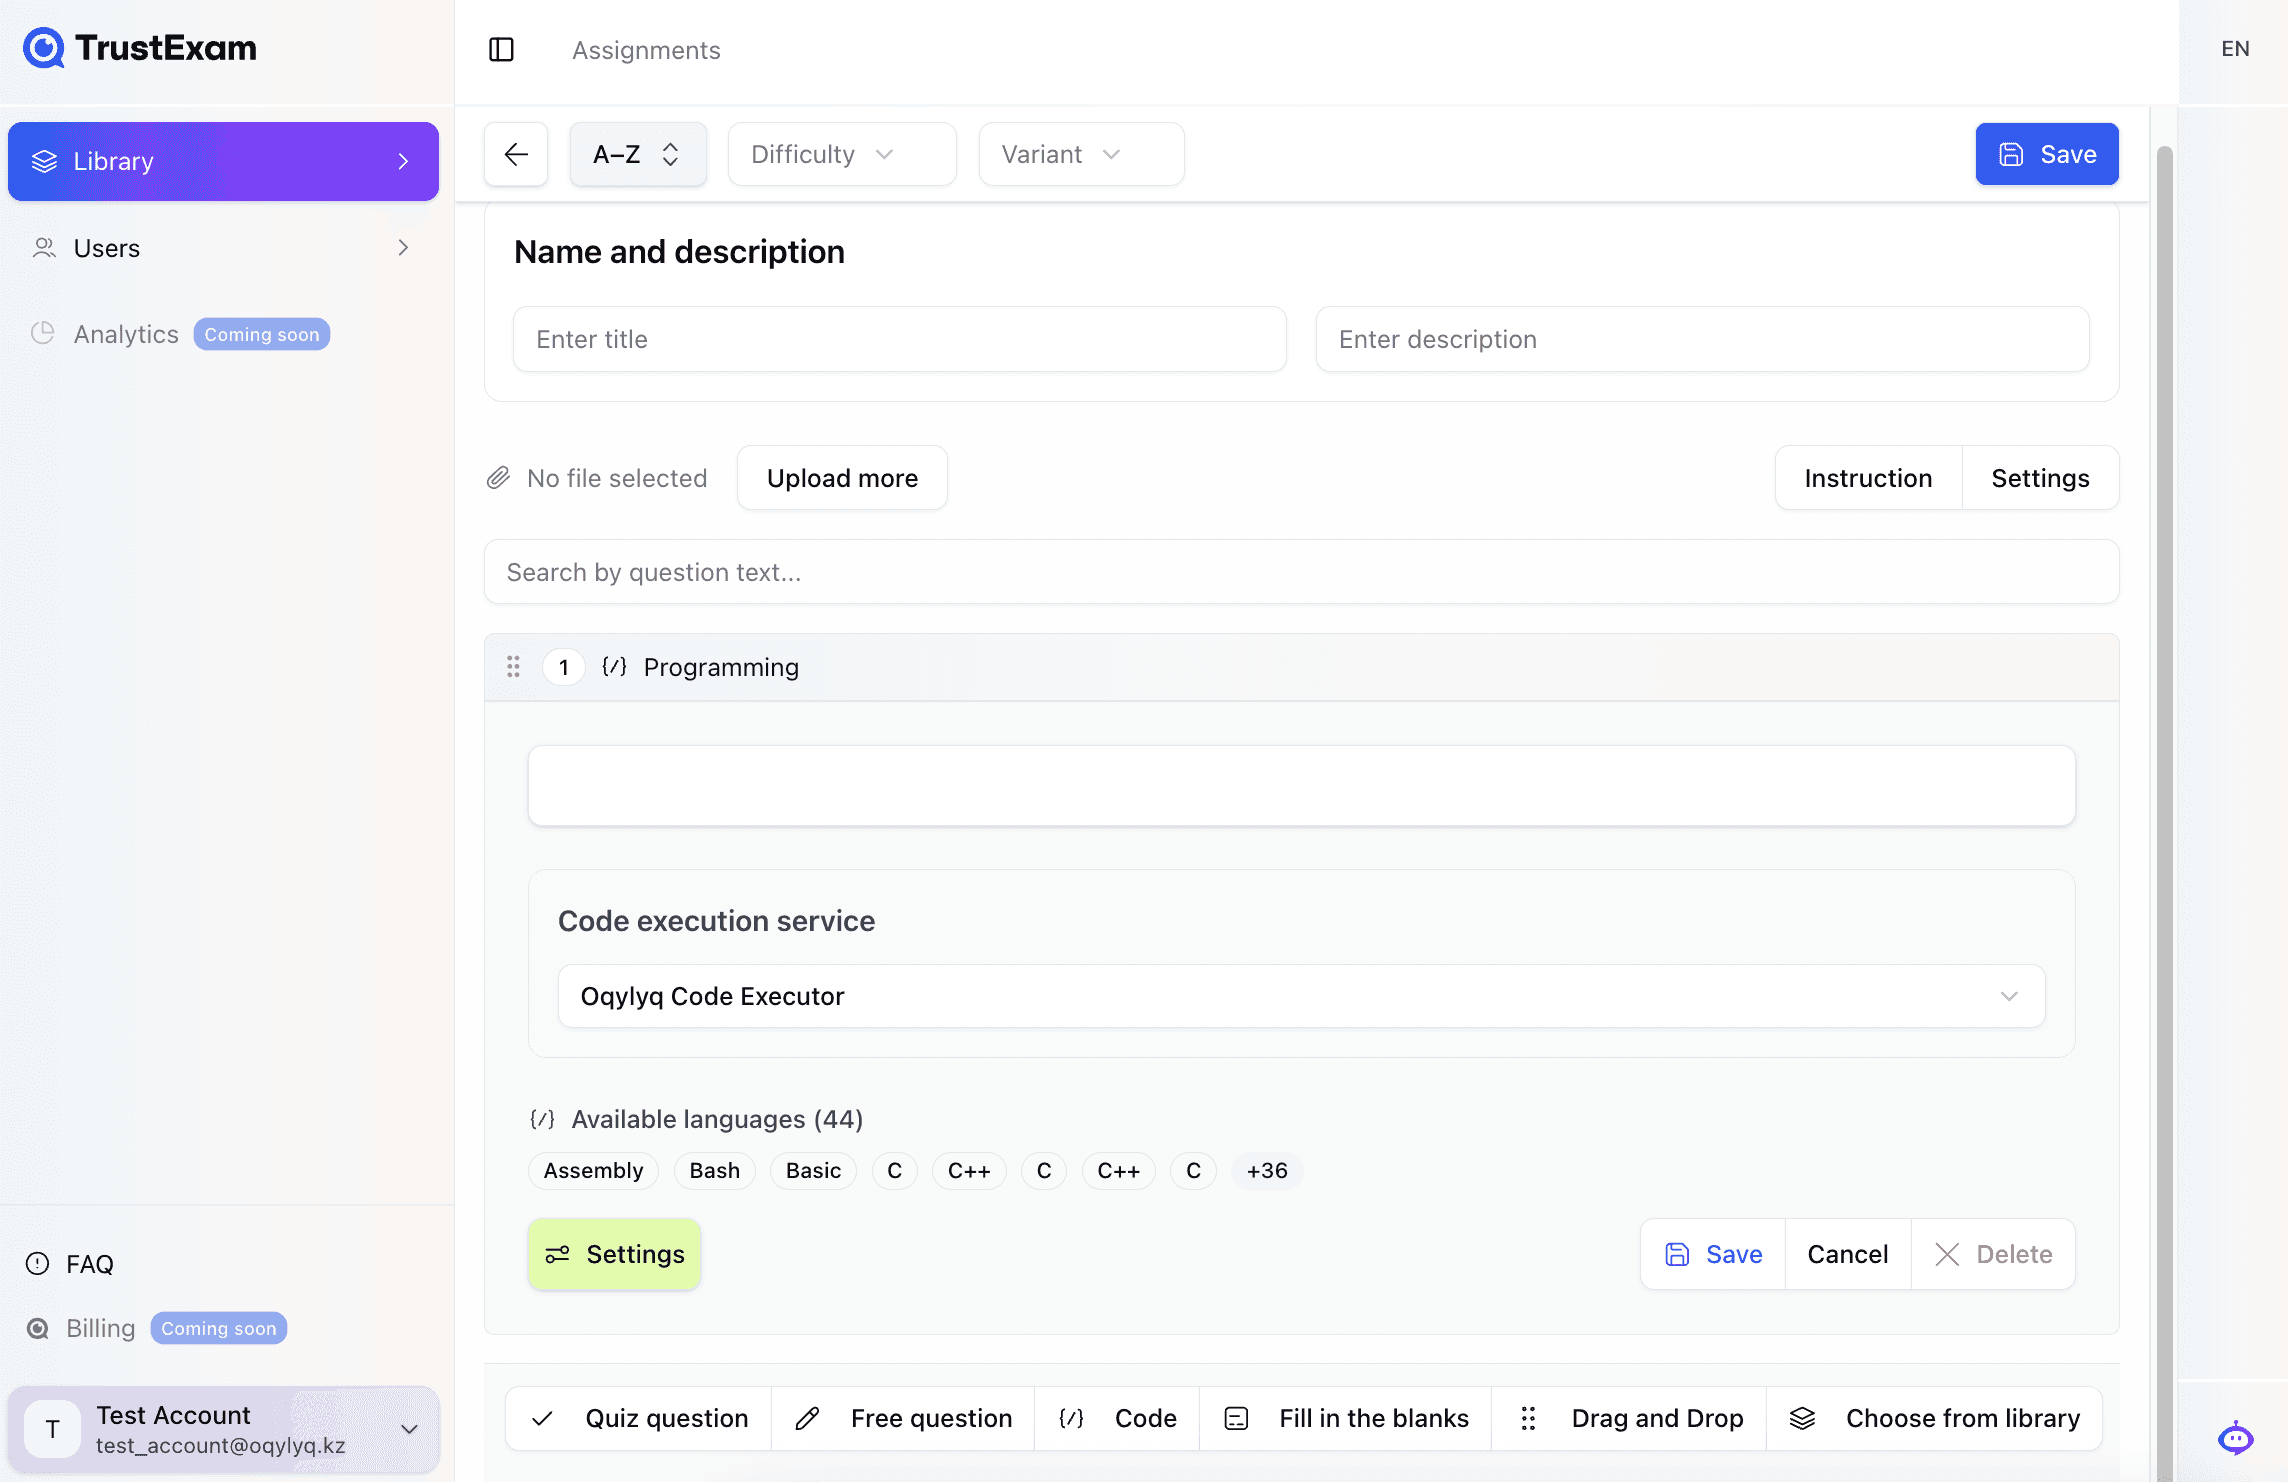
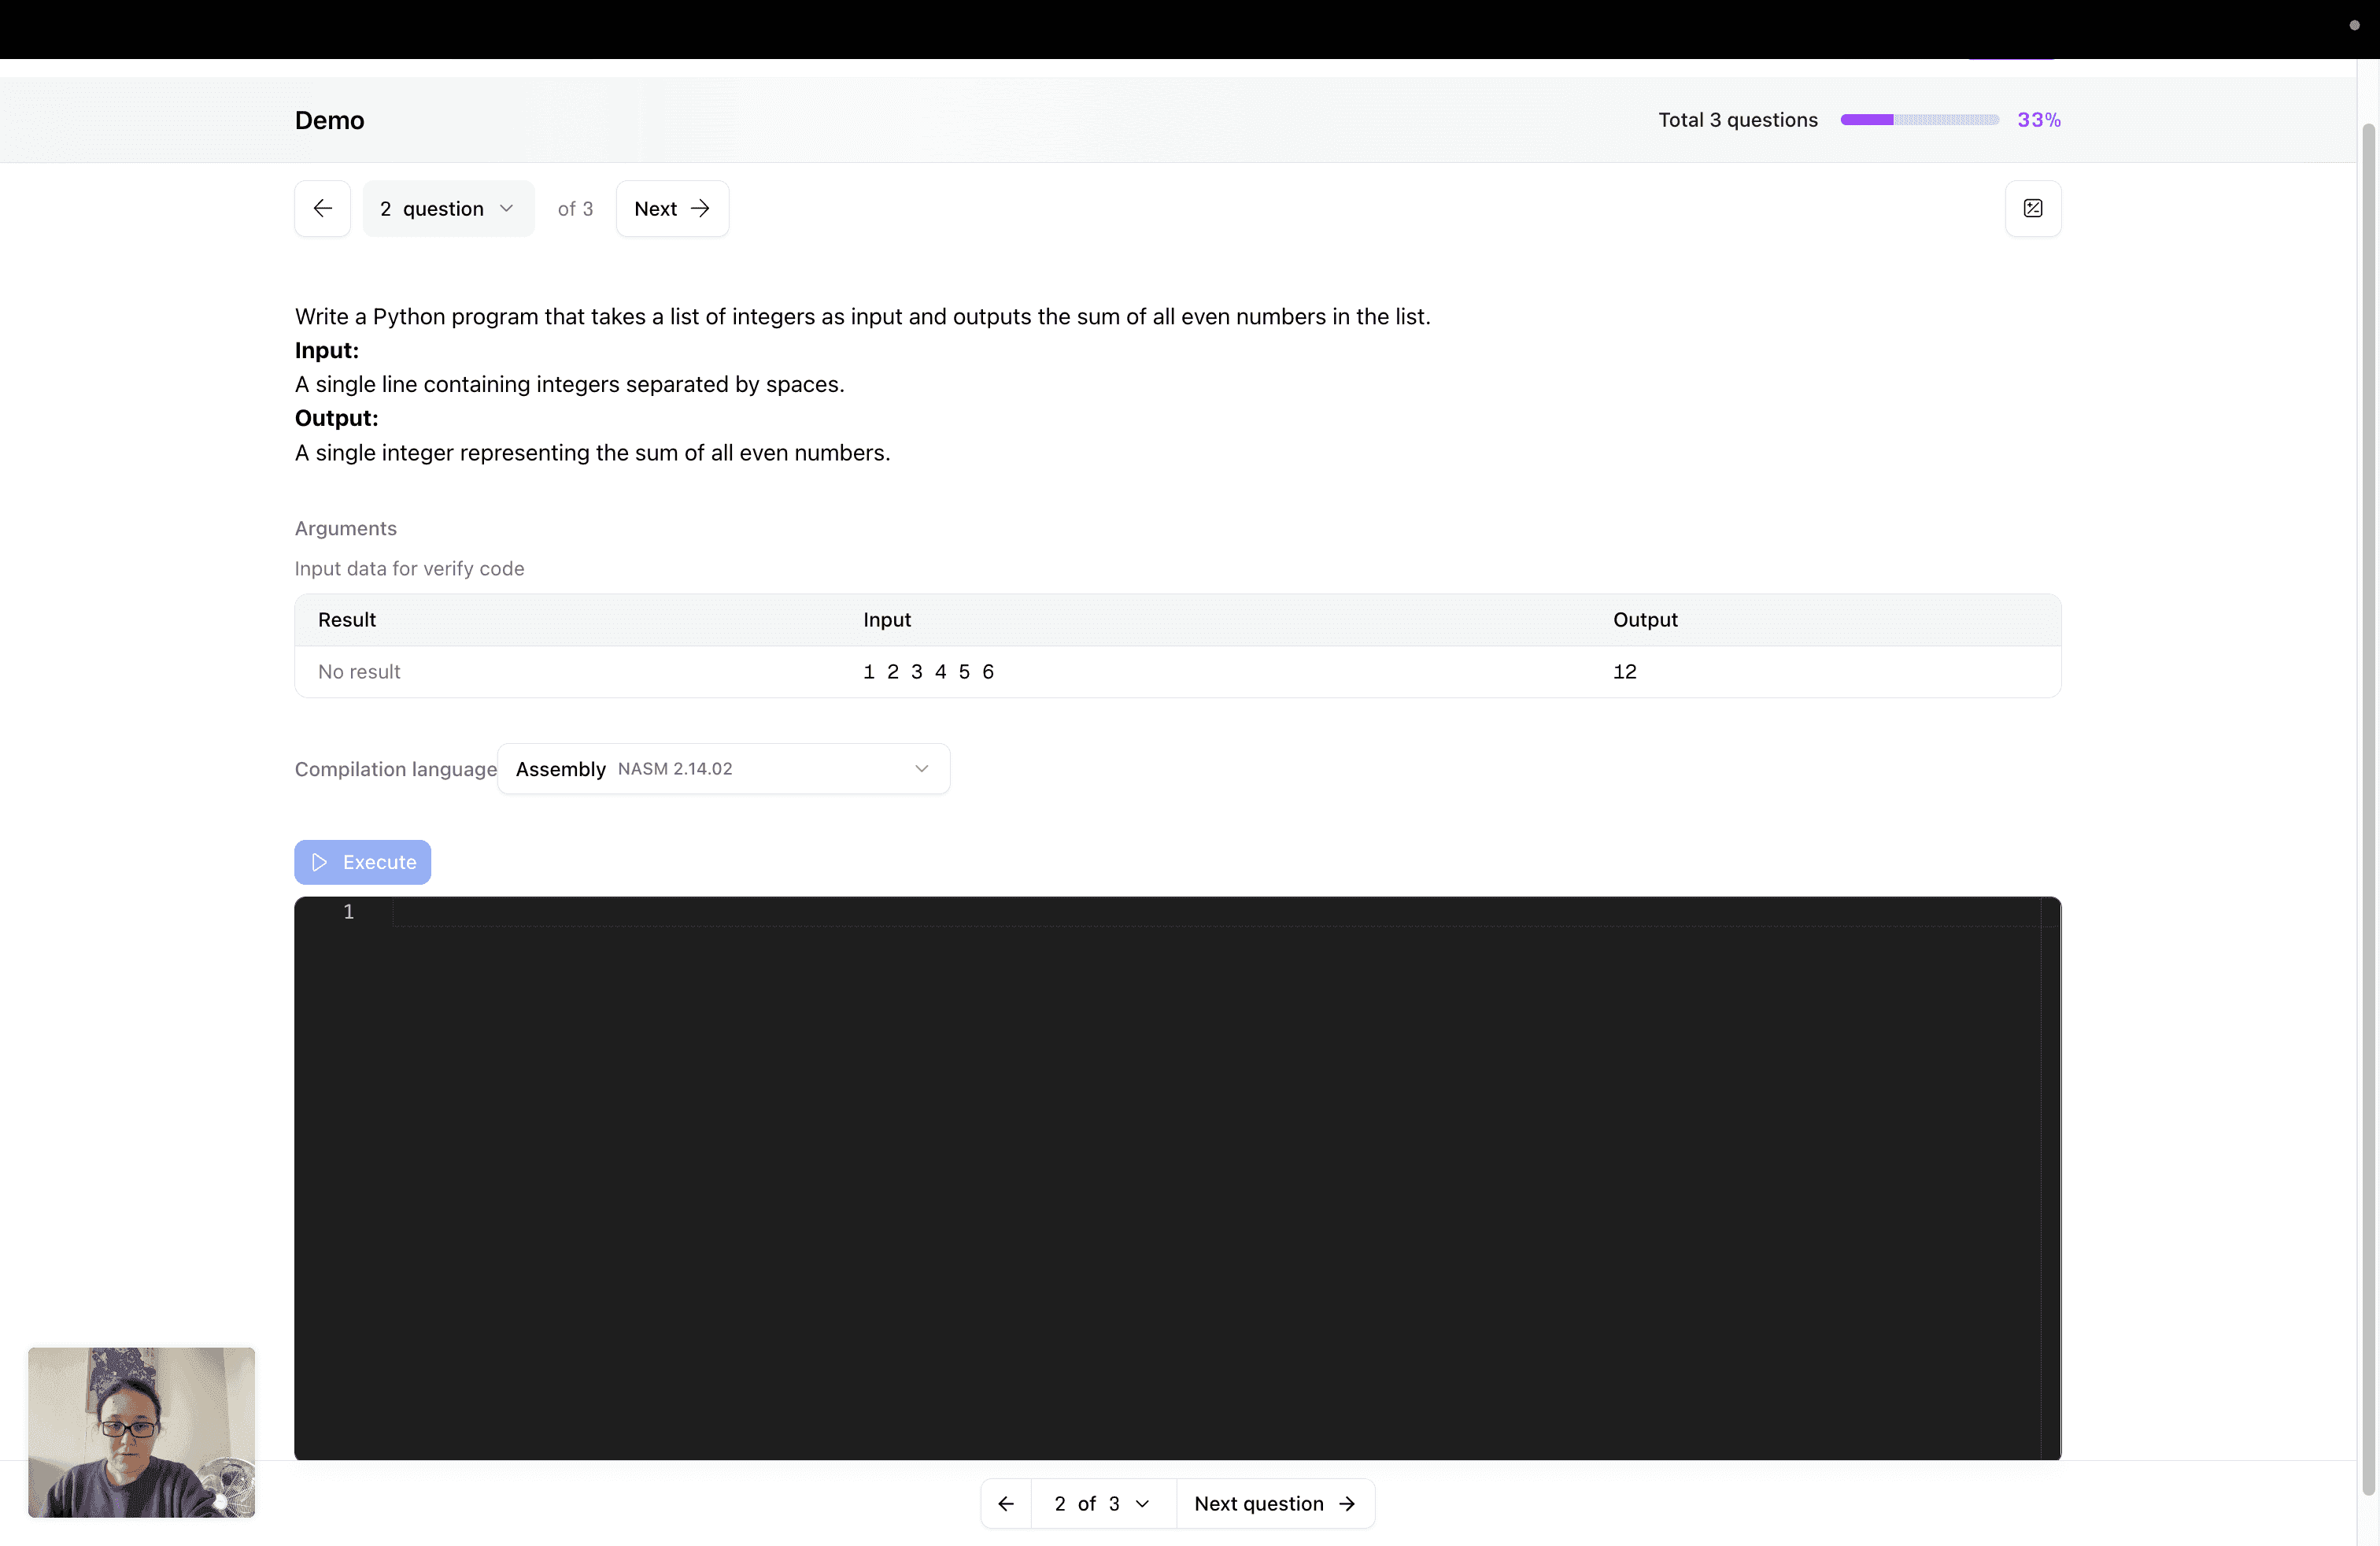
The "Code Compiler" question type is designed to test programming skills. The student must write code that correctly solves the given task and passes the specified test cases.
For this type of question, you must:select a compilation and execution service;
provide a task description to be shown to the student;
set input data and expected results for automatic verification.
Compilation ServiceThe "Compilation Service" field is where you select the environment where the student's code will run .
The service is responsible for launching, checking, and returning the program execution result.
Arguments (Test Cases)The "Arguments" section is used to define test cases to verify the correctness of the solution.
For each test case, the following is specified:
Input — arguments or data passed to the program;
Output — the expected execution result.
You can add multiple test cases. The code is considered correct if the execution result matches the expected output for all tests.
Programming Languages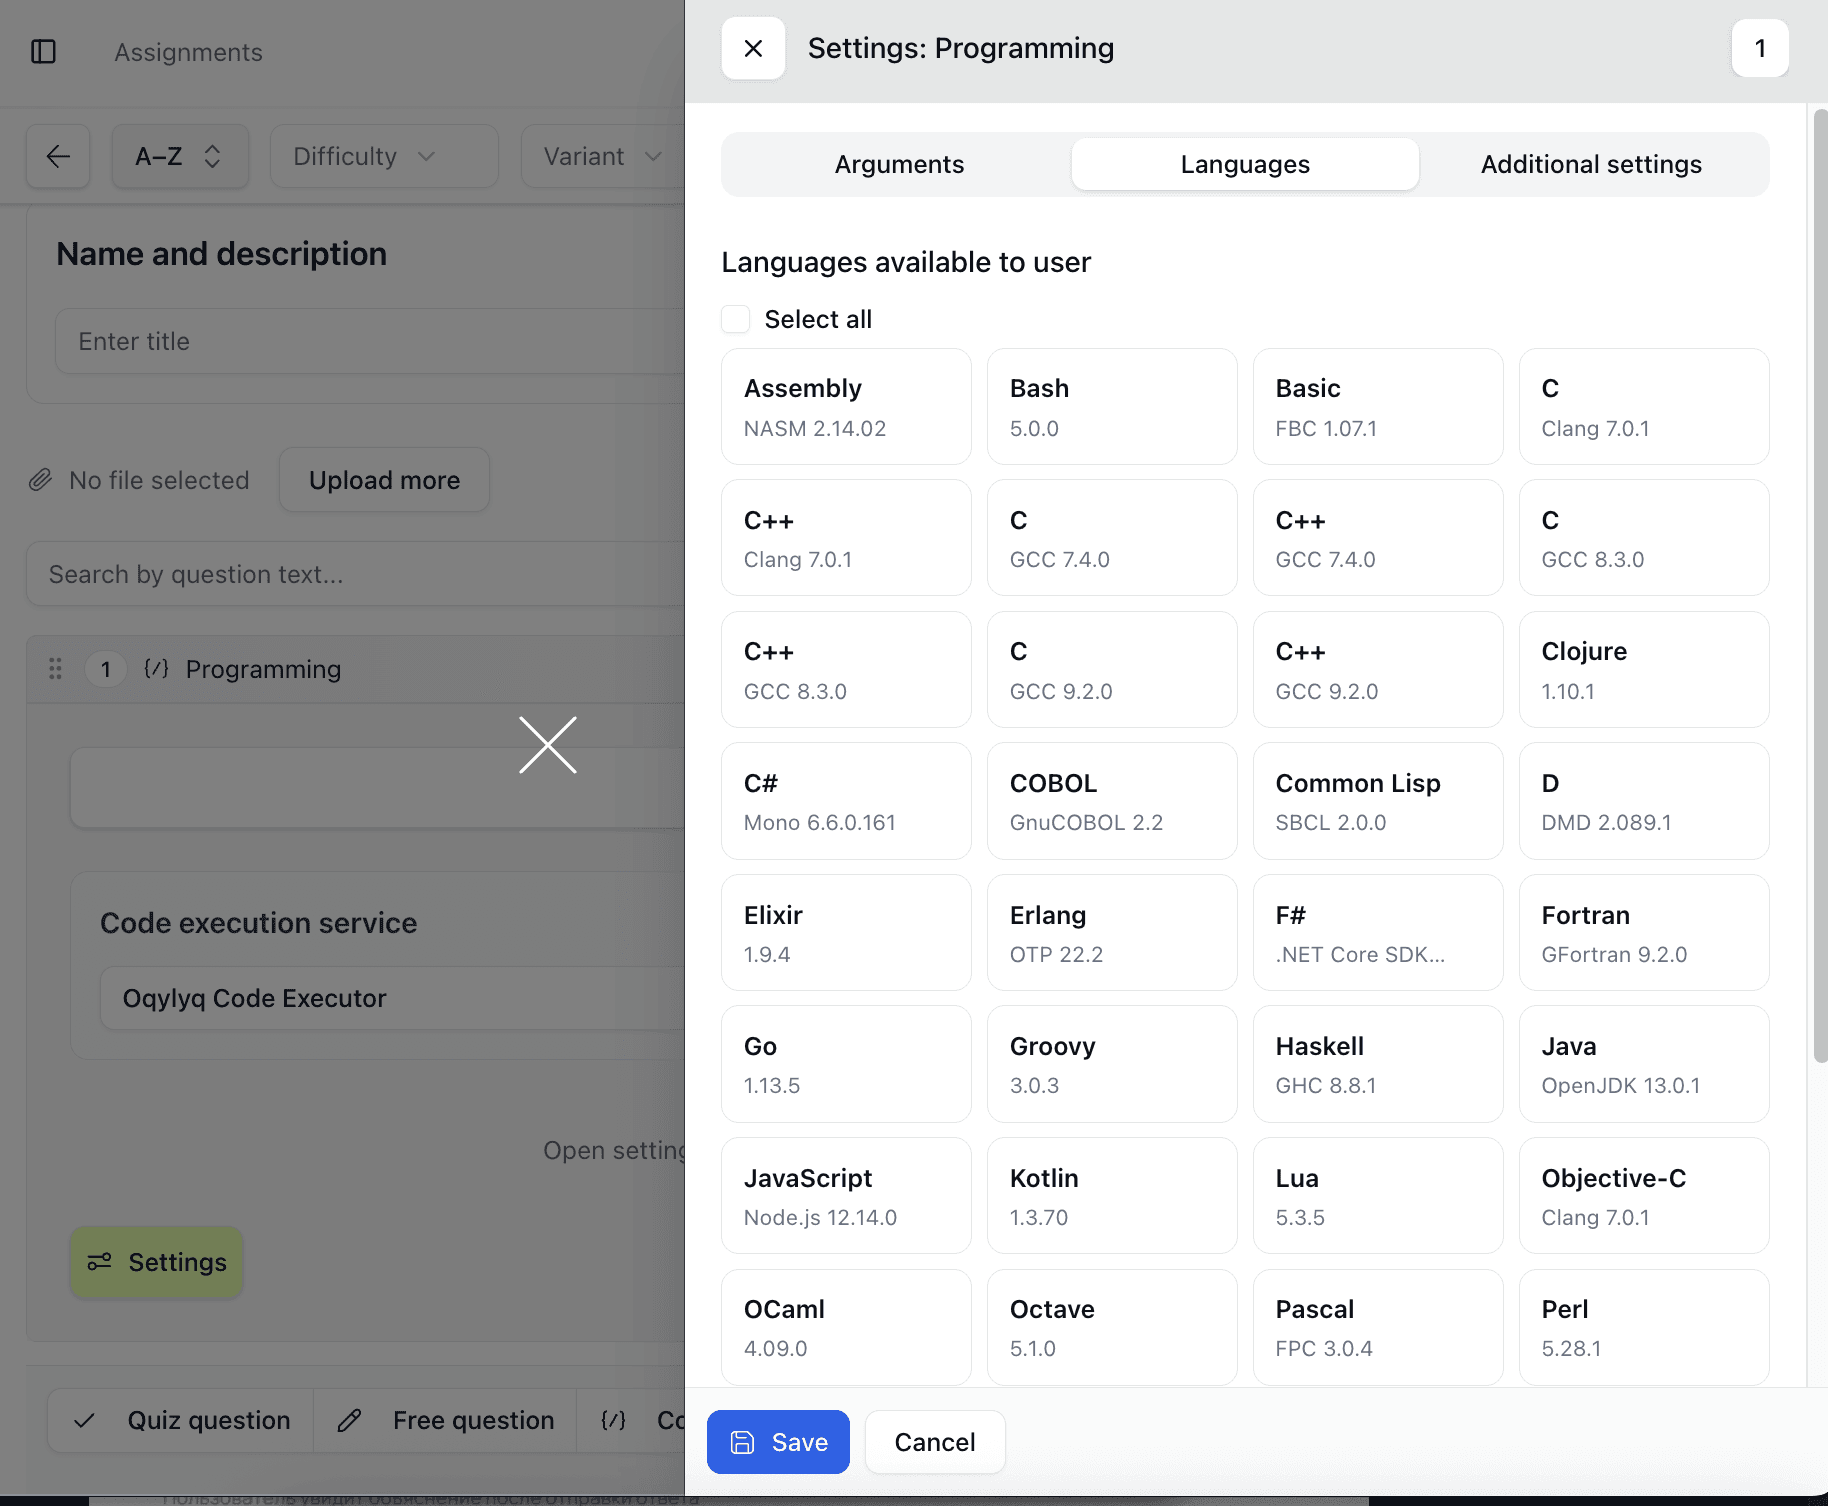
In the "Languages" section, you can limit the list of programming languages available to the student when completing the task.Fill in the Blanks
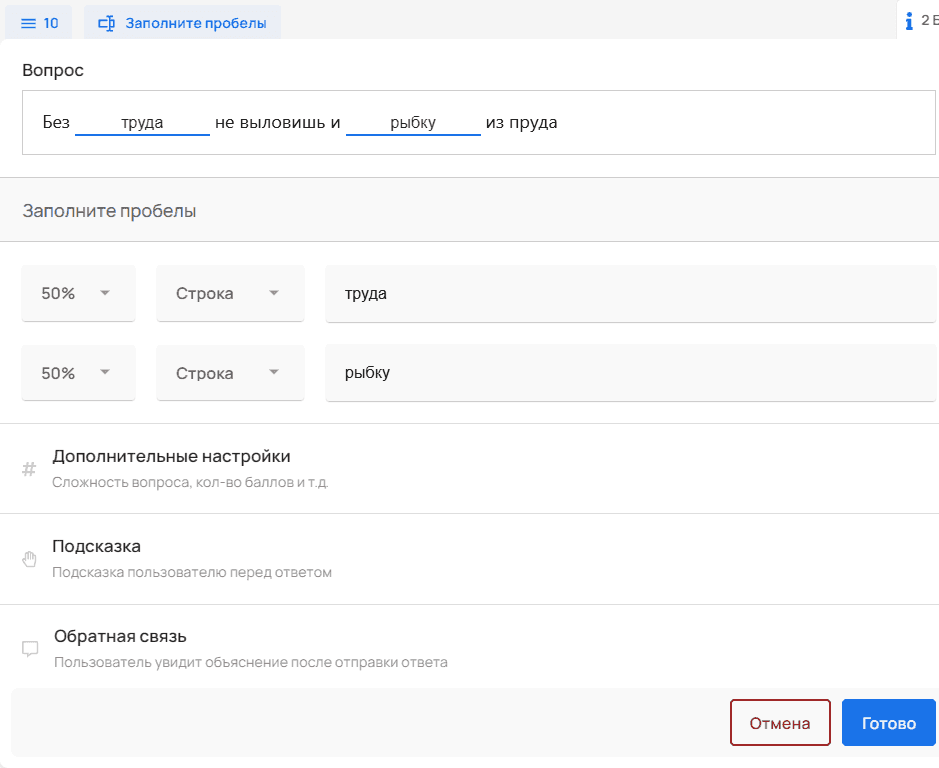
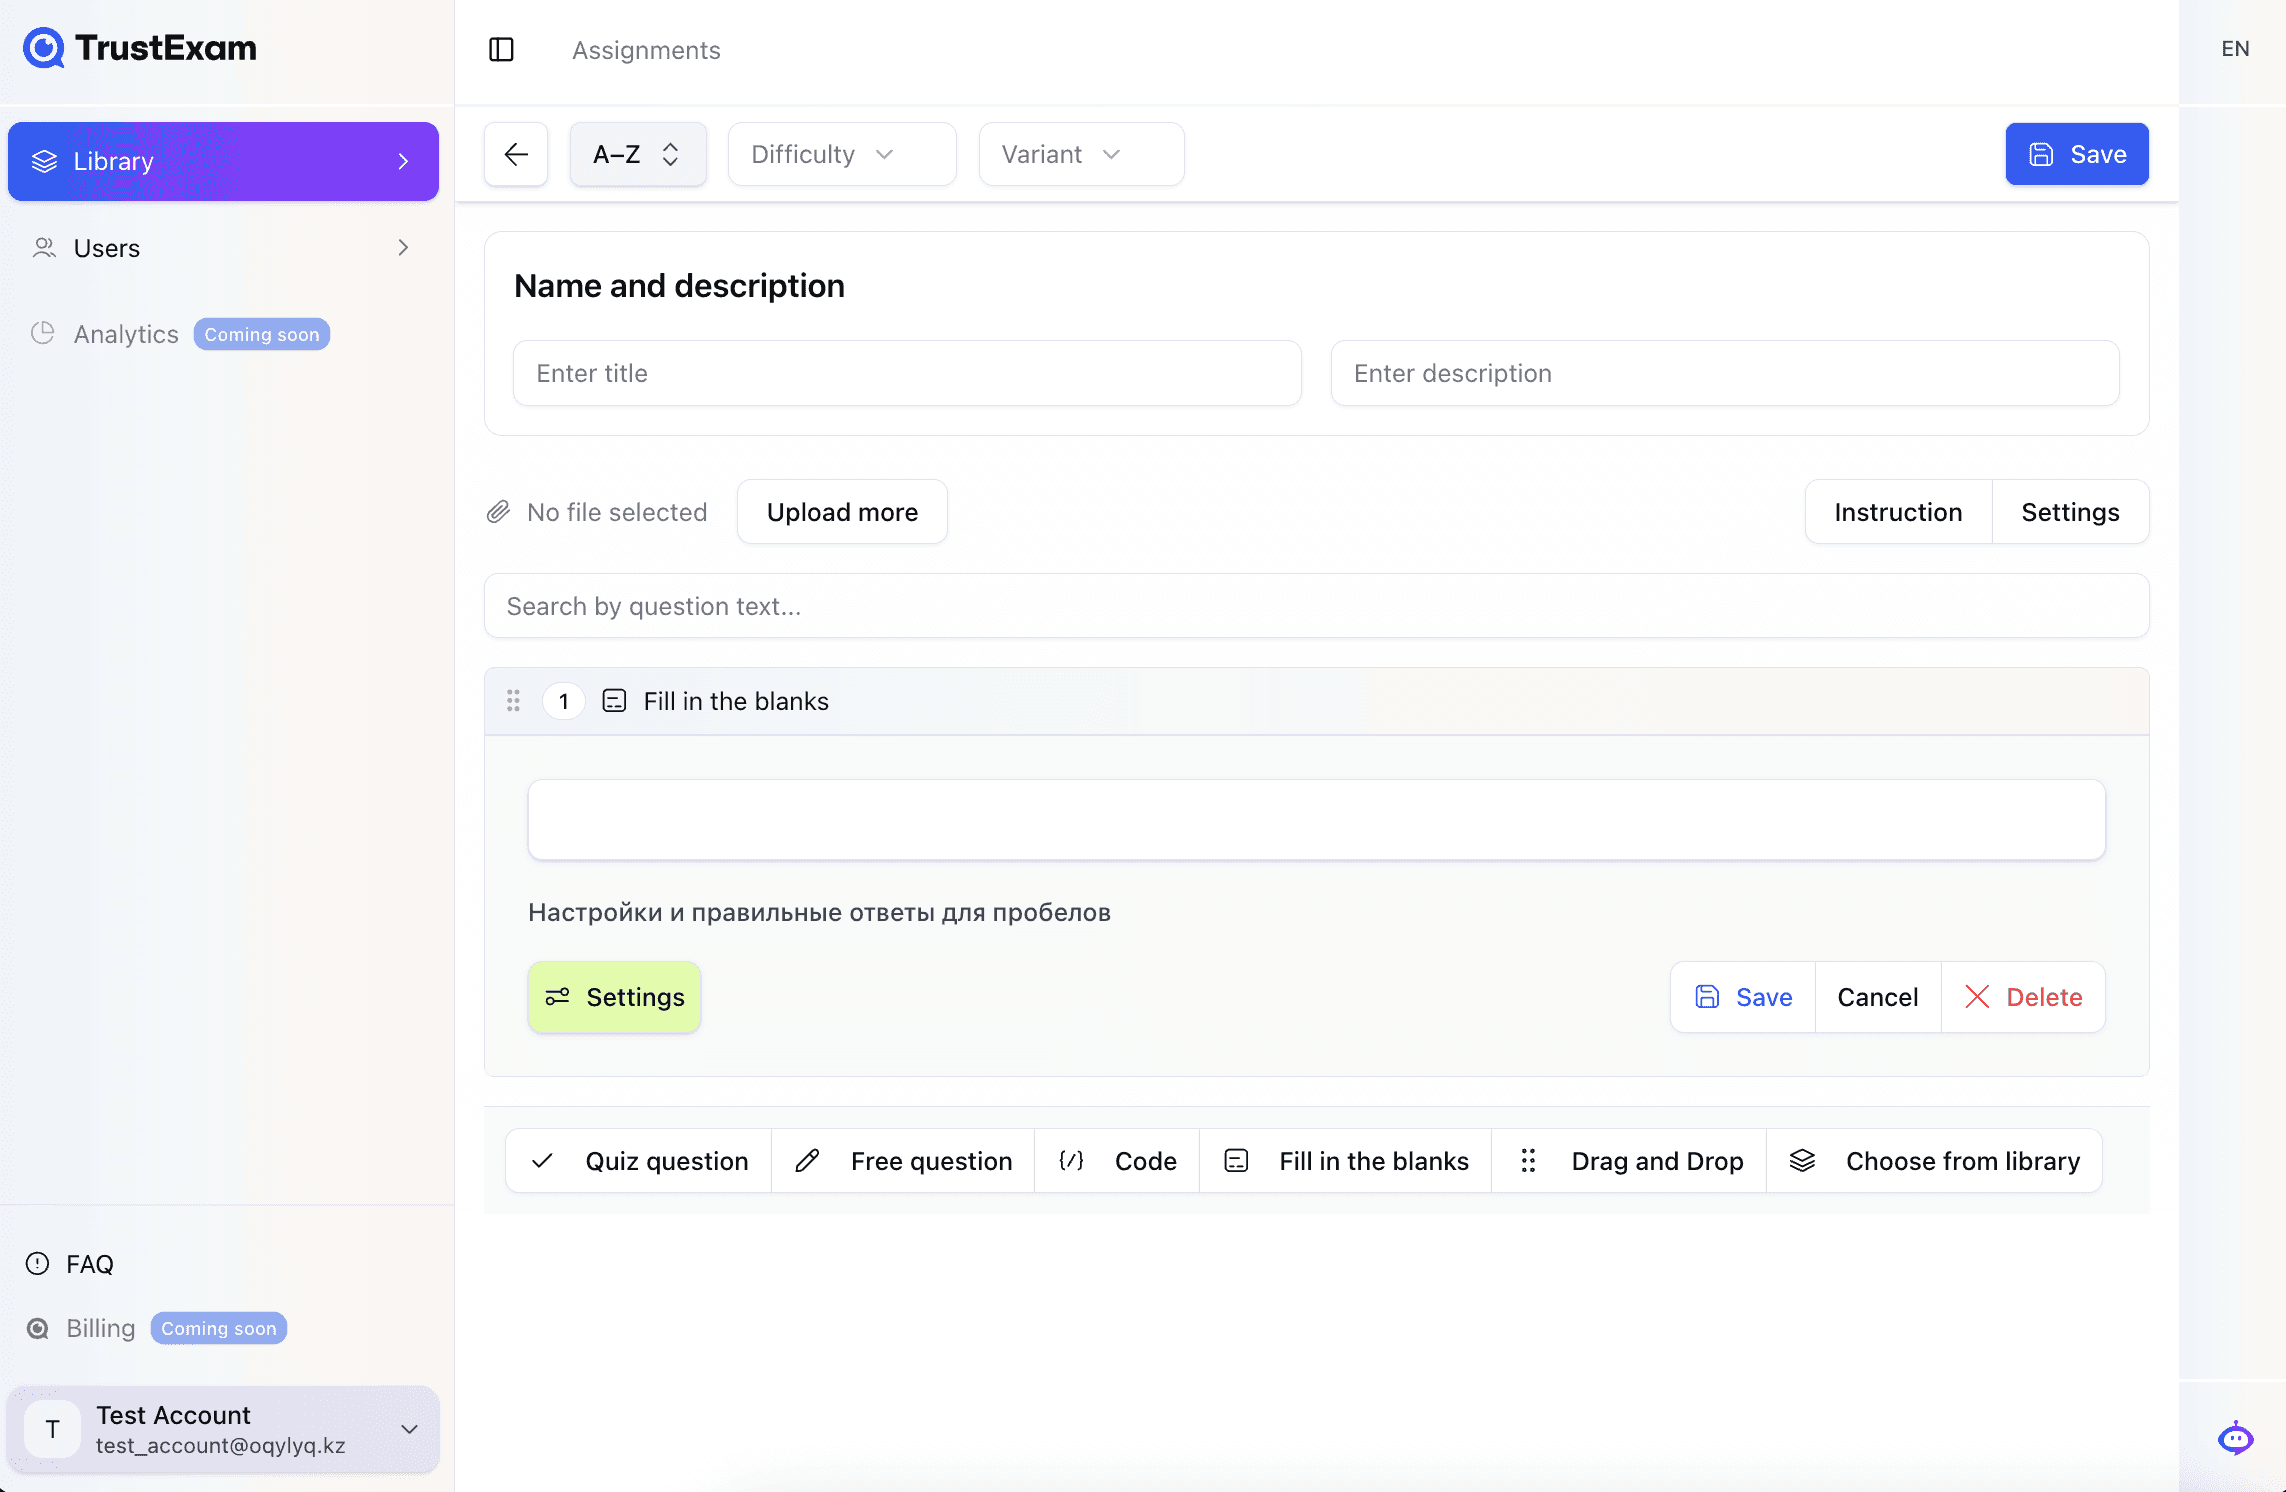
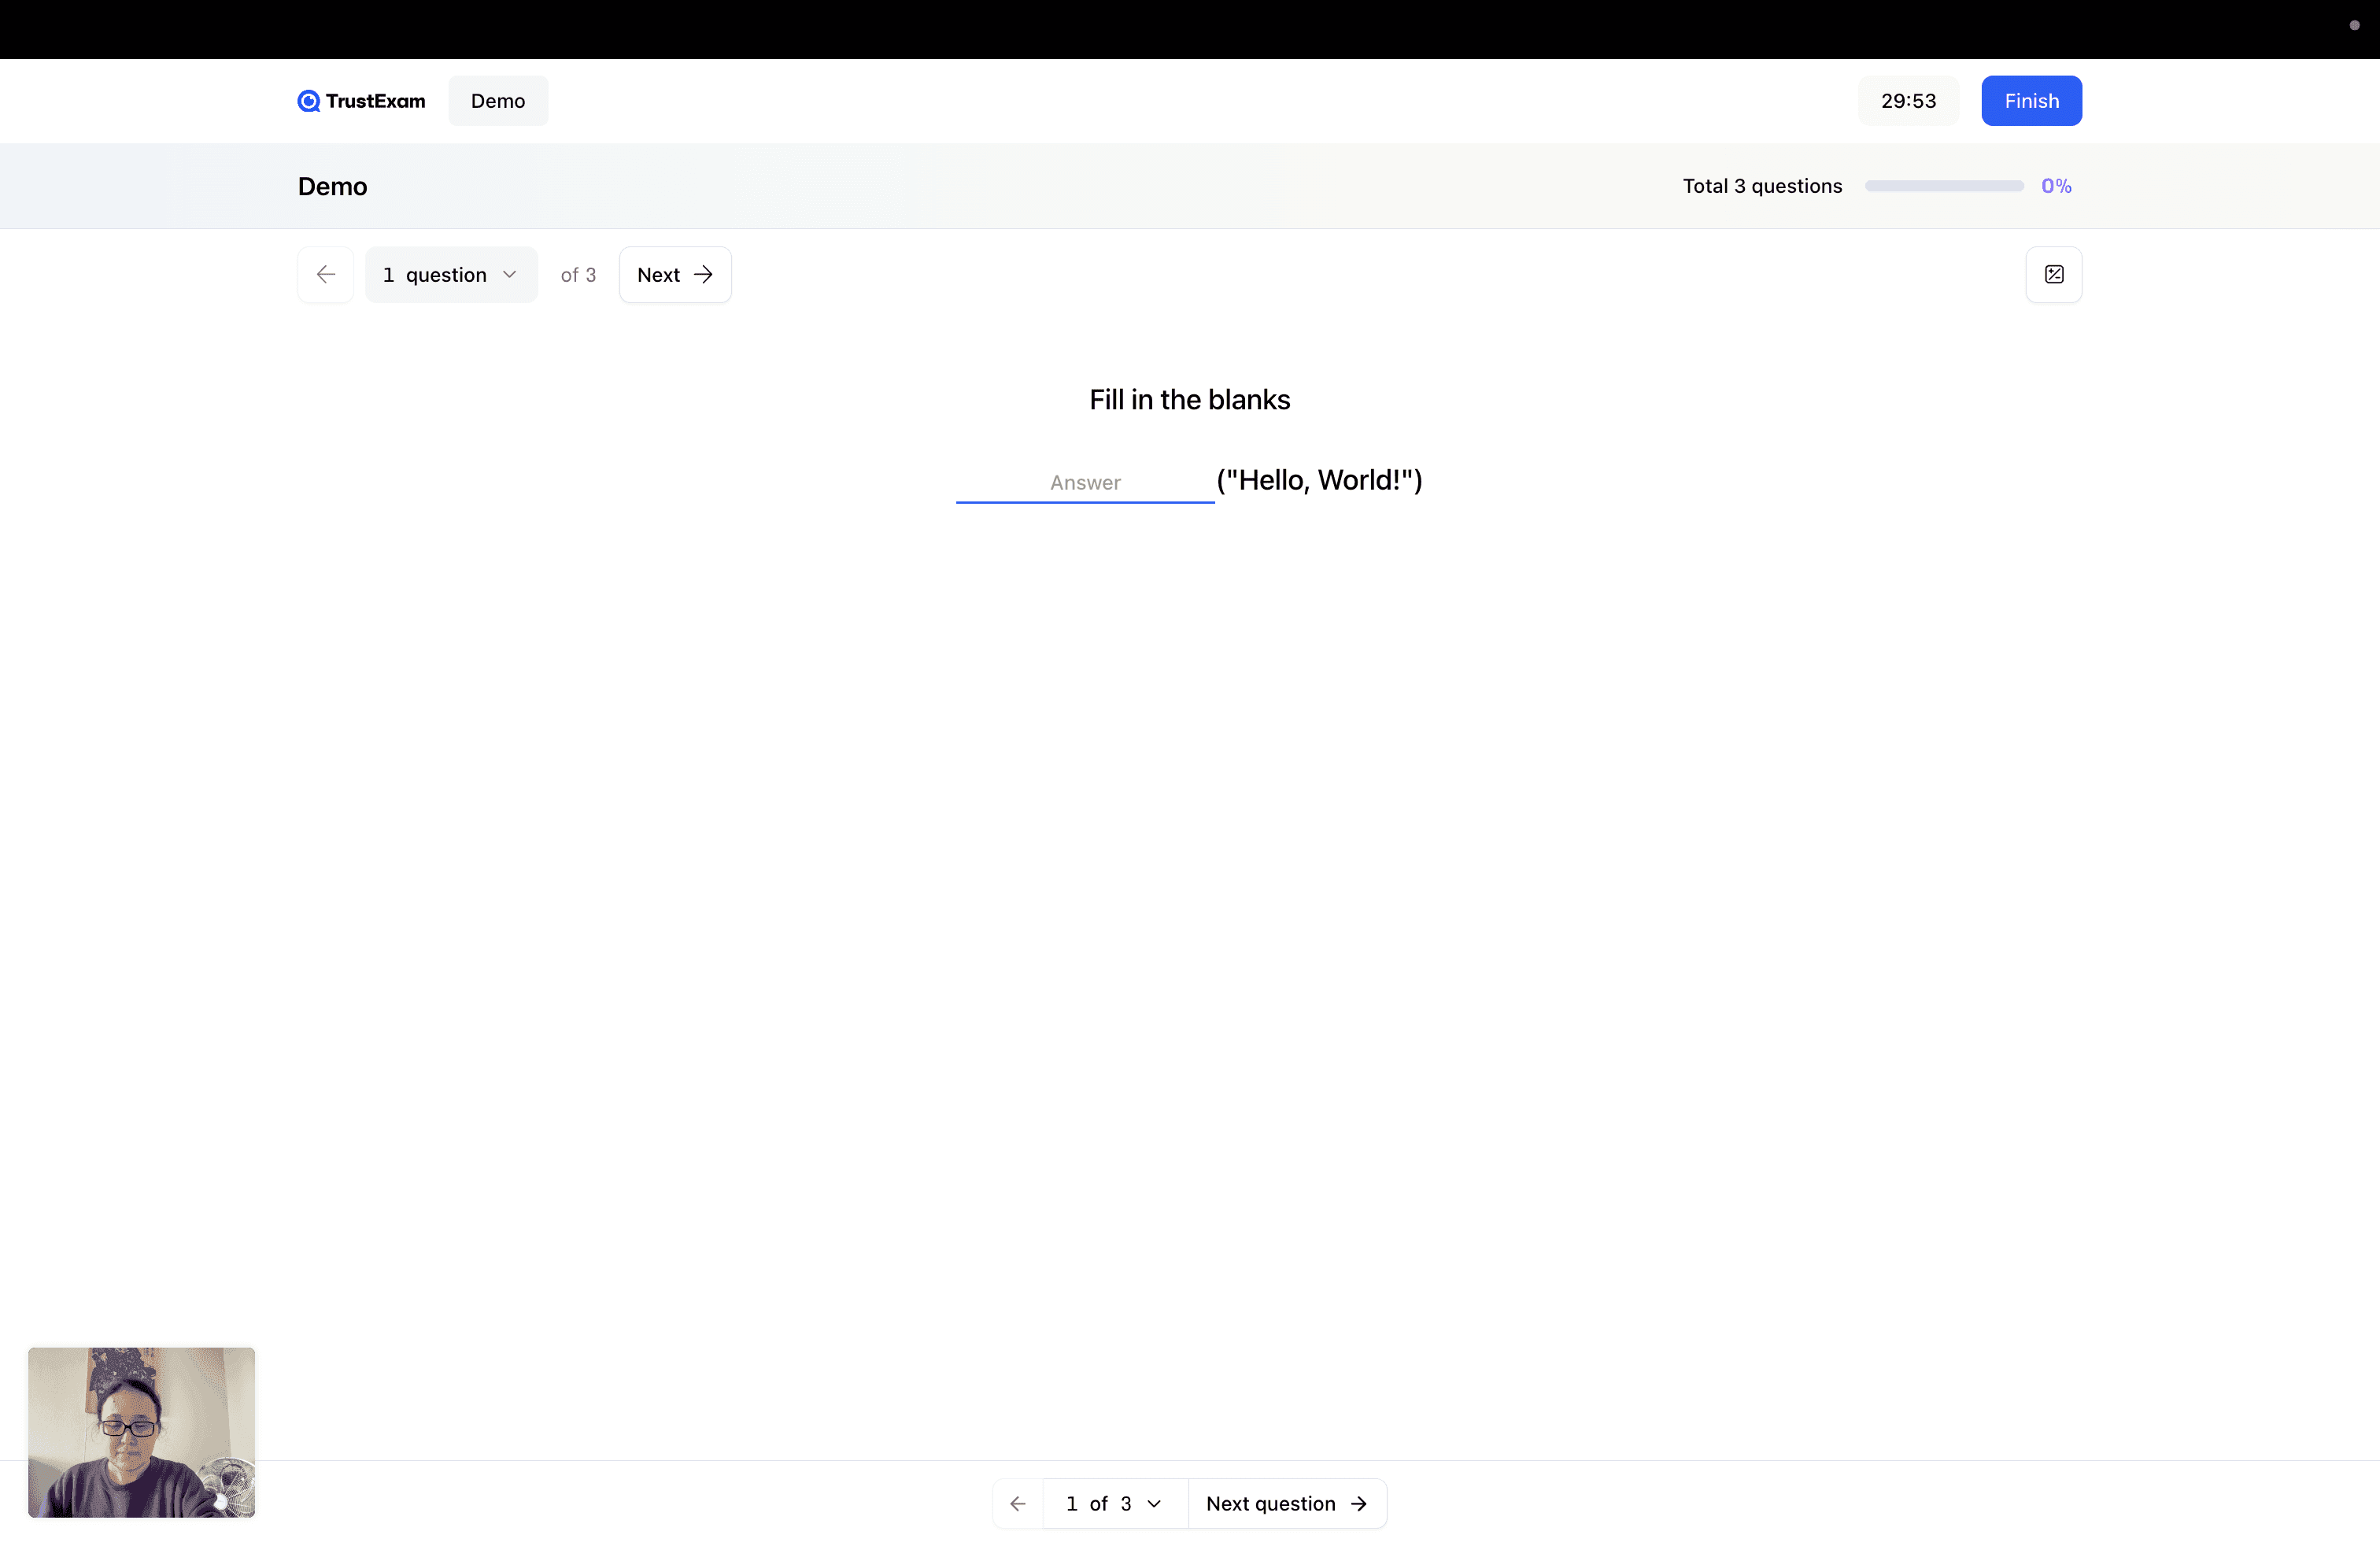
The "Fill in the Blanks" question type is used for tasks where students need to insert correct values into missing spots within a text. In the question text, the teacher indicates the blanks that the student must fill during the test.

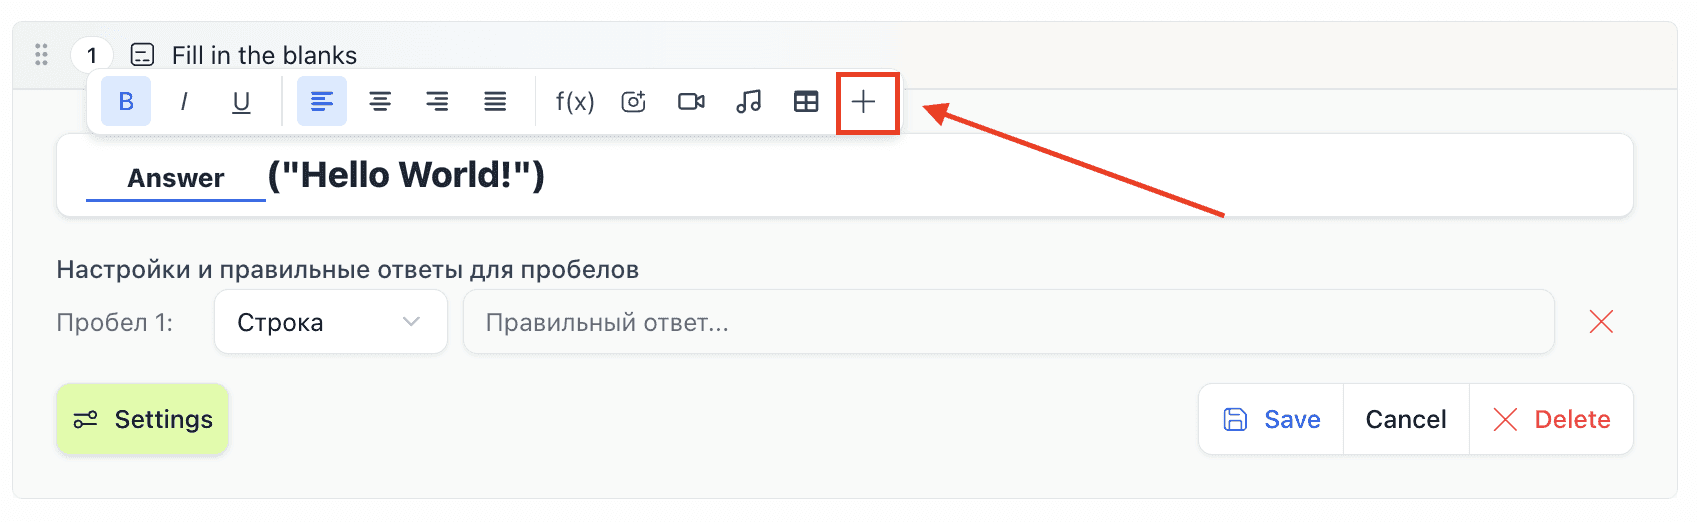
To add a "blank", place the cursor in the desired location and click the "+" button in the question input field.
Blank Settings
For each blank, the parameters for the correct answer are defined:
Value — the correct answer for this blank;
Blank type, which determines the format of the input data:
string — text value;
number — numeric value;
any — any value is accepted;
mask — the value must match a specified pattern;
Each blank is checked separately according to the specified parameters.
Answer Verification
The student's answer is considered correct if the values entered into the blanks match the set rules and formats.
Additional Ways to Add Questions


You can also:
Add existing questions from the question library
Import questions from XLS or CSV files
This significantly speeds up the test creation process, especially when working with large or repetitive tasks.
Configuring Question Parameters
For each question, you need to configure the following parameters:
Hint (optional)
Text displayed to the examinee as a hint when answering the question.Feedback (optional)
A message that is displayed after the answer is submitted.Difficulty Level and Difficulty Group
Select one of the available levels:Easy
Medium
Hard
Points for correct answer
The number of points awarded for a correct answer.Penalty points for incorrect answer
The number of points deducted for an incorrect answer (if the parameter is enabled).Question Variant
Used to create different versions of the same question.
Correct parameter configuration ensures an objective grading system and a unified approach to knowledge assessment.
Finalizing Test Creation
After configuring all questions, the test is automatically saved and displayed on the "Test and Task Library" page.
This test can then be used when creating assignments, exams, or interviews.
Editing the Content of an Existing Test
You can edit the test questions and their parameters. Please note that changes are not applied to already created assignments and will only be used in new assignments. To save your changes, click the "Save" button.